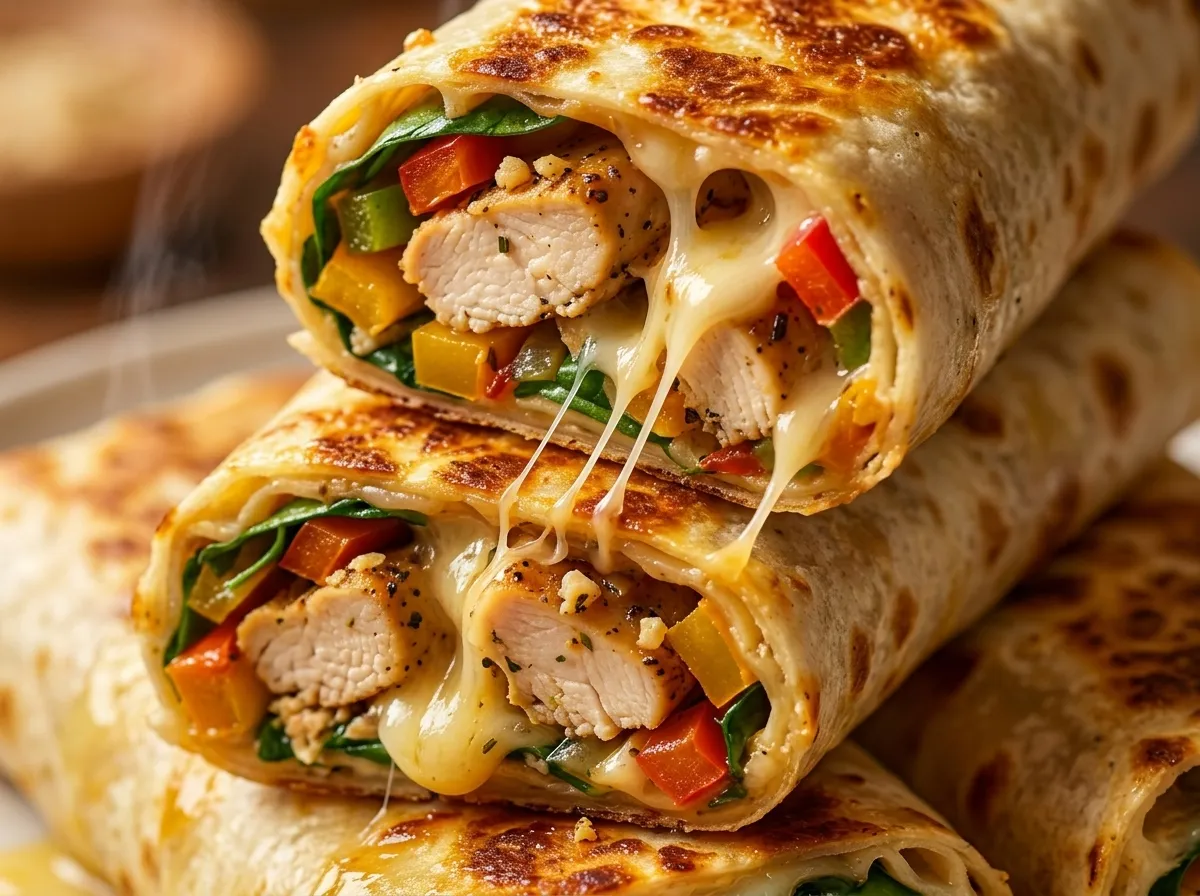
There’s something about a warm, golden wrap that just feels like a win on a weeknight. These cheesy garlic chicken wraps have been in our dinner rotation long enough that my daughters now beat me to the kitchen on the nights they smell garlic hitting a hot pan. And honestly, I get it. Crispy on the outside, gooey and garlicky inside — they come together in about 25 minutes from start to finish. If you’re looking for a crowd-pleasing dinner that doesn’t have you tied to the stove for an hour, this is it.
Dad used to say that the best meals are the ones that make everyone sit down before you even call them. These wraps have that effect every single time. The smell alone does the work.
If you’re also a fan of fast, satisfying dinners on busy nights, our Easy Four-Ingredient Chicken Enchilada Casserole is another one worth bookmarking.
Why You’ll Love These Cheesy Garlic Chicken Wraps
They’re fast. We’re talking 10 minutes of prep and about 15 minutes of actual cooking. On a Tuesday night when everyone’s tired and hungry, that matters.
The garlic flavor is real. Not subtle, not faint — you get that punchy, fragrant hit from fresh cloves cooked right into the chicken. I use 4 full cloves and I’d never go less.
Kids actually eat them. My daughters go through these faster than I can plate them, and they’re not exactly adventurous eaters. The cheesy pull from the mozzarella-cheddar blend helps a lot there.
They’re also incredibly flexible. Swap the filling, change the greens, use what’s in your fridge. The base formula is forgiving and consistent. And leftovers (if you have any) reheat beautifully in a skillet the next day.
Ingredients for Cheesy Garlic Chicken Wraps
I’ve made this recipe more times than I can count, and I’ve landed on a combination that works every time. Nothing fancy here — just good, honest ingredients that do their job.
- 4 boneless, skinless chicken breasts (about 1 lb), diced into bite-sized pieces
- 4 cloves fresh garlic, minced
- 1 teaspoon Italian herbs (dried oregano, basil, or a blend)
- Salt and black pepper, to taste
- 1 cup bell peppers, diced (any color)
- 1 cup shredded cheese (mozzarella and cheddar blend works best)
- 4 large flour tortillas
- 1 tablespoon extra virgin olive oil
- 1 cup fresh spinach or lettuce
For the chicken, I always buy boneless skinless breasts and dice them myself rather than buying pre-cut. They cook more evenly when the pieces are uniform — aim for about 3/4-inch chunks.
Fresh garlic is non-negotiable for me here. The jarred stuff just doesn’t give you the same fragrant kick when it hits the hot oil. For the cheese, I find that a mix of mozzarella and cheddar gives you the best of both worlds: the mozzarella melts into that stretchy pull, and the cheddar adds a little sharpness.
If you want to bulk these up, you can swap the spinach for arugula, or add a handful of sliced mushrooms to the bell pepper step. The tortillas should be large flour ones — they’re the most pliable and hold up to the filling without tearing when you roll.
How to Make Cheesy Garlic Chicken Wraps
The key to these wraps is building flavor in layers. You cook the chicken first, then add the aromatics, then the vegetables — so everything has a chance to develop on its own before it all comes together.
- Heat 1 tablespoon of extra virgin olive oil in a large skillet over medium heat. Once the oil is shimmering, add the diced chicken in an even layer. Cook for 5 to 6 minutes, stirring occasionally, until the pieces are golden on the outside and cooked through.
Pro Tip: Don’t crowd the pan. If all the chicken goes in at once and the pieces are touching, they’ll steam instead of sear. Work in two batches if your skillet is on the smaller side.
- Stir in the minced garlic and Italian herbs. Cook for about 2 minutes, stirring constantly, until the garlic is fragrant and just starting to turn golden. Keep the heat at medium — you don’t want the garlic to brown too fast or it’ll go bitter.
- Add the diced bell peppers to the pan. Cook for 3 to 5 minutes, stirring a few times, until they’re just slightly softened but still have a little bite. Season with salt and black pepper to taste.
Common Mistake to Avoid: Overcooking the peppers. They should have a little snap left. If they go fully soft and mushy, they’ll add too much moisture to the filling and your wraps won’t crisp up properly.
- Lay the flour tortillas flat on a clean surface. Spoon the chicken mixture evenly down the center of each one, then top with a handful of shredded cheese and a bit of fresh spinach or lettuce.
- Fold in both sides of each tortilla over the filling, then roll from one end to the other tightly. Make sure the seam side ends up on the bottom when you set them down.
Pro Tip: Don’t overfill. A generous spoonful and a handful of cheese is enough. More filling sounds better, but it makes a proper tight roll nearly impossible and the wrap falls apart in the pan.
- Heat a clean skillet over medium heat. Place each wrap seam-side down in the pan and cook for 2 to 3 minutes per side until the tortilla is golden brown and the cheese inside has fully melted. Serve immediately.
What to Serve with Cheesy Garlic Chicken Wraps
These wraps are filling enough on their own, but a good side rounds out the meal nicely.
A simple green salad with a lemon vinaigrette cuts through the richness of the cheese and keeps things feeling balanced.
Roasted sweet potato wedges are my go-to when I want something heartier. They take about 25 minutes in the oven at 400°F, so you can time them to be ready right when the wraps come off the pan.
Corn salsa or a quick pico de gallo adds brightness and a little acidity that works really well against the garlicky chicken.
For something scoopable on the side, guacamole or even a plain sliced avocado with lime and salt does the job without any extra work.
If the kids are hungry and you want a full spread, soup is a natural pairing. Our Creamy One-Pot Potato Hamburger Soup is a family staple and comes together fast enough to serve alongside these wraps on the same night.
Sliced cucumber with a little ranch dressing is also always a hit at our table when my girls are involved in the dinner decision.
Pro Tips and Variations
Let the wrap rest for 30 seconds before you put it in the pan. This sounds minor, but it lets the filling settle and helps the tortilla hold its shape when you flip it.
Use a heavy pan for crisping. A cast-iron skillet or a thick stainless pan holds heat more evenly than a thin non-stick, and you’ll get a more consistent golden crust on both sides.
Grate your own cheese if you have a few extra minutes. Pre-shredded cheese has a starch coating that keeps it from melting as smoothly. Freshly grated mozzarella and cheddar melt into something entirely different.
For a spicier version, mix a teaspoon of red pepper flakes in with the garlic, or add a drizzle of hot sauce inside the wrap before rolling.
Buffalo chicken variation: skip the Italian herbs, season the chicken with paprika and cayenne, and use buffalo sauce in place of the garlic cook step. Finish with blue cheese instead of cheddar.
Vegetarian version: replace the chicken with roasted zucchini, mushrooms, and black beans. Use the same garlic and herb seasoning. It holds up just as well and the wrap crisps exactly the same.
Low-carb version: use large lettuce leaves instead of tortillas and skip the pan-crisping step. Pile the filling in and fold. It won’t be as crispy but it’s still a solid meal.
If you’re looking for another high-protein, family-friendly dinner to add to your week, our Zesty Lemon and Herb Greek Chicken Tenders are worth trying next.
Storage and Reheating Tips
Leftover wraps keep well in the fridge for up to 3 days. Store them in an airtight container. If you want to keep the tortilla from getting soggy, store the chicken filling separately and assemble fresh wraps when you’re ready to eat.
To reheat: a skillet over medium heat for 2 to 3 minutes per side is by far the best method. It brings the exterior back to crispy and heats the filling all the way through. The microwave works in a pinch — about 60 seconds wrapped in a damp paper towel — but you’ll lose the crunch.
I sometimes make a double batch of the chicken filling on Sunday and refrigerate it. The assembly on a weeknight takes about 5 minutes from there.
Common Questions
Can I use chicken thighs instead of breasts?
Yes, and in some ways they’re better — thigh meat stays juicier and has more flavor. Just dice them the same way and cook until the internal temperature reaches 165°F.
Can I make these ahead of time?
The filling can be made up to 2 days in advance and stored in the fridge. I’d recommend assembling and crisping the wraps fresh each time for the best texture.
What if I don’t have fresh garlic?
Garlic powder works as a substitute — use about 1/2 teaspoon per clove. The flavor is more subtle, but it still comes through in the finished wrap.
Can I freeze these?
You can freeze the assembled (untoasted) wraps individually in plastic wrap, then in a zip-lock bag, for up to 2 months. Reheat straight from frozen in a 375°F oven for about 15 minutes, flipping once halfway through.
My wrap keeps falling apart when I roll it. What am I doing wrong?
Two likely culprits: the filling is too wet, or you’re overstuffing. Make sure the chicken mixture isn’t releasing too much liquid before you fill the tortillas. If needed, let it sit off the heat for a minute to dry out slightly before assembly.
These cheesy garlic chicken wraps are the kind of dinner that earns a spot in your permanent rotation — not because they’re complicated, but because they’re exactly what a weeknight meal should be: fast, satisfying, and always a hit at the table. Dad always believed the best food was the kind that brought people together without a lot of fuss, and these wraps fit that idea perfectly. Give them a try and let me know what your family thinks.
Cheesy Garlic Chicken Wraps
Ingredients
Equipment
Method
- Heat 1 tablespoon of extra virgin olive oil in a large skillet over medium heat. Once the oil is shimmering, add the diced chicken in an even layer. Cook for 5 to 6 minutes, stirring occasionally, until golden on the outside and cooked through. Avoid crowding the pan — work in batches if needed.
- Stir in the minced garlic and Italian herbs. Cook for about 2 minutes, stirring constantly, until the garlic is fragrant and just starting to turn golden. Keep the heat at medium to avoid burning the garlic.
- Add the diced bell peppers to the pan. Cook for 3 to 5 minutes, stirring a few times, until slightly softened but still with some bite. Season with salt and black pepper to taste.
- Lay the flour tortillas flat on a clean surface. Spoon the chicken mixture evenly down the center of each one. Top with a generous handful of shredded cheese and a bit of fresh spinach or lettuce.
- Fold in both sides of each tortilla over the filling, then roll tightly from one end to the other. Place seam-side down on a plate and let rest for 30 seconds.
- Heat a clean skillet over medium heat. Place each wrap seam-side down in the pan and cook for 2 to 3 minutes per side until the tortilla is golden brown and the cheese inside is fully melted. Serve immediately.