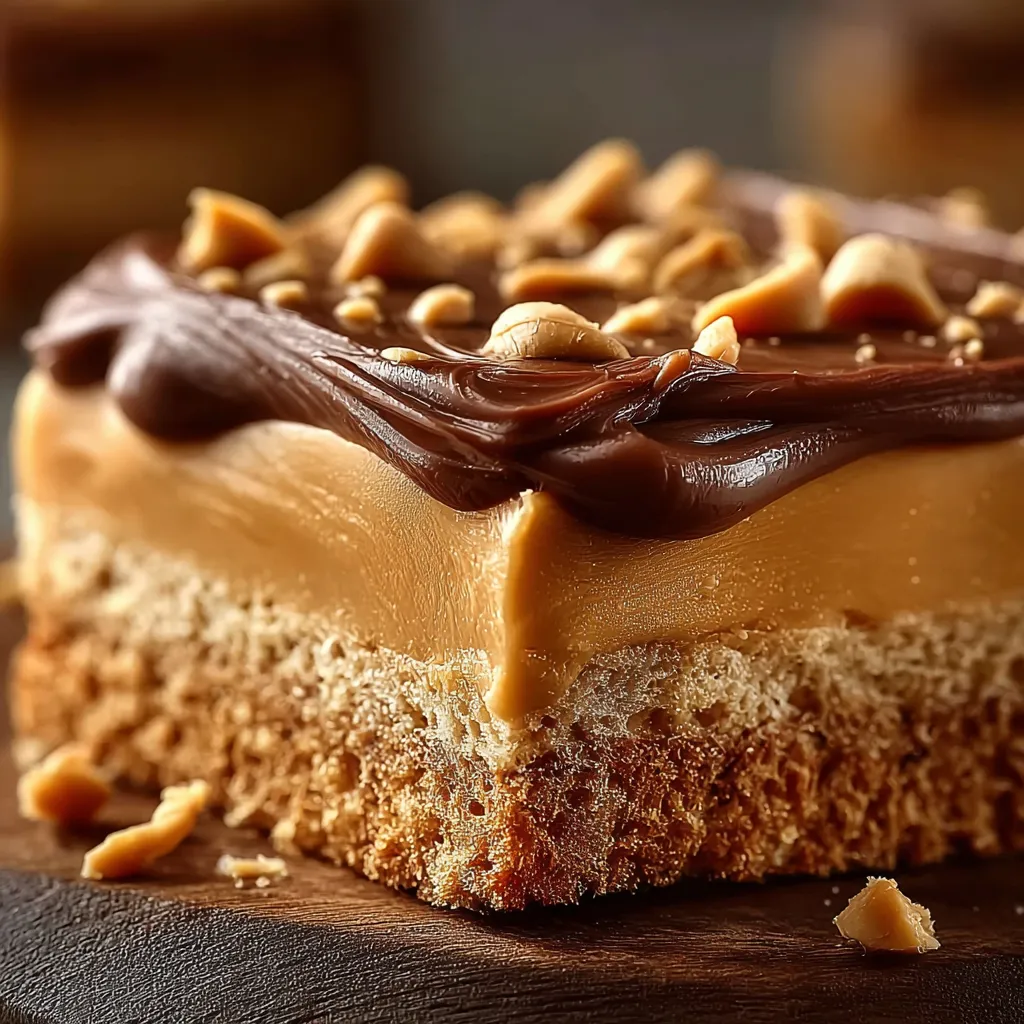
The Ultimate No-Bake Peanut Butter Chocolate Bars
Peanut Butter
Table of Contents
Imagine a world where your favorite candy bar—a perfect balance of salty peanut butter and sweet chocolate—comes together in a dessert you can make at home, without even turning on your oven. Welcome to the world of these incredible no-bake peanut butter chocolate bars. They’re a nostalgic treat that takes you back to childhood bake sales and potlucks, but with a grown-up twist. These bars are a staple in many American homes, celebrated for their simplicity and satisfying flavor. The classic combination is a timeless pairing that everyone loves, making this recipe a guaranteed hit at any gathering.
What makes these bars truly special is their origin in the realm of simple, honest-to-goodness home cooking. This is the kind of recipe passed down through generations, scribbled on a recipe card stained with years of love and ingredients. It’s a testament to the power of a few simple ingredients to create something truly magical. The charm of this recipe lies in its approachable nature; there’s no need for fancy techniques or specialized equipment. It’s pure, unadulterated comfort food that’s perfect for a lazy afternoon or a last-minute dessert craving.
Recipe Overview
- Cuisine: American
- Difficulty: Easy
- Total Time: 1 hour 10 minutes
- Dietary: Vegetarian
Equipment and Tools
To whip up these delightful bars, you won’t need a lot of special gear, but having the right tools on hand will make the process a breeze.
- Large Mixing Bowl: You’ll need a spacious bowl to combine the base ingredients without making a mess.
- 9×13-inch Baking Dish: This is the ideal size for achieving the perfect bar thickness. The depth should be at least 2 inches to hold both the base and the chocolate topping.
- Parchment Paper: This is your secret weapon for a clean lift. Make sure to use enough to create a sling to easily remove the bars from the pan.
- Measuring Cups and Spoons: Accurate measurements are key. You’ll need cups for the dry ingredients (graham cracker crumbs and powdered sugar) and the butter and peanut butter.
- Spatula or Wooden Spoon: A sturdy spatula is perfect for mixing the thick peanut butter base and for pressing it evenly into the pan.
- Microwave-Safe Bowl: You’ll use this to melt the chocolate chips and peanut butter for the topping. A glass bowl is a great option as it heats evenly.
- Serrated Knife (optional but recommended): A heated knife is a game-changer for slicing clean, professional-looking bars once they’ve chilled.
Serving Suggestions
These no-bake bars are fantastic on their own, but a few simple additions can take them to the next level.
- Plating: Arrange the bars neatly on a platter or a beautiful dessert stand. For a more elegant look, serve them individually on small plates with a drizzle of chocolate sauce or a sprinkle of powdered sugar.
- Garnish: A pinch of flaky sea salt on top of the chocolate layer is a must for a sophisticated sweet-and-salty flavor. You can also add some finely chopped peanuts for extra crunch or a few mini chocolate chips for a decorative touch.
- Complementary Pairings: A tall glass of cold milk is the classic pairing. For a warm beverage, try a rich coffee or hot cocoa. If you want to make a truly indulgent dessert, serve a bar alongside a scoop of vanilla bean ice cream or a dollop of whipped cream.
Nutritional Information
While these bars are a treat, it’s helpful to know what you’re enjoying.
- Calories: Approximately 280 kcal per bar.
- Macronutrients: Each bar contains a balanced mix of carbohydrates from the powdered sugar and graham cracker crumbs, fats from the butter and peanut butter, and a bit of protein from the peanut butter.
- Potential Health Benefits: Peanut butter provides healthy fats and protein, which can help you feel full and satisfied. Chocolate, particularly dark chocolate, contains antioxidants. Of course, this is a dessert, so it’s best enjoyed in moderation as a special treat.
Storage and Reheating
Proper storage is key to keeping these bars fresh and delicious.
- Refrigeration: The bars should be stored in an airtight container in the refrigerator. They will stay fresh for up to 5-7 days. The chill helps maintain their firm texture.
- Freezing: For long-term storage, you can freeze the bars. First, wrap individual bars tightly in plastic wrap, then place them in an airtight, freezer-safe container or a freezer bag. They will last for up to 3 months.
- Reheating: These bars are designed to be served cold, so no reheating is necessary. Simply take them out of the fridge or freezer a few minutes before serving to let them soften slightly if desired.
Expert Tips and Variations
Even though this recipe is straightforward, a few pro tips can elevate your baking game.
- Common Mistakes to Avoid: Don’t skip the chilling time! The bars need at least an hour to set properly. If you try to slice them too early, they’ll be a gooey mess. Also, make sure to use a good quality peanut butter. Natural peanut butter that separates can make the base too oily, so stick to a creamy, no-stir variety for the best results.
- Creative Variations:
- Sweet-and-Salty Twist: As mentioned, a sprinkle of flaky sea salt on the chocolate topping is a game-changer.
- Nutty Crunch: For a different texture, use crunchy peanut butter instead of creamy for the base.
- White Chocolate: Swap out the semi-sweet chocolate chips for white chocolate chips for a sweeter, creamier topping.
- Nut-Free Option: For a nut-free version, use sunflower seed butter or a similar nut-free spread.
- Seasonal Adaptations:
- Holiday Cheer: Add a few drops of peppermint extract to the chocolate topping for a festive, minty flavor.
- Fall Favorite: Stir a teaspoon of pumpkin pie spice into the graham cracker base for a cozy autumn twist.
- Summer Fun: Mix in a handful of shredded coconut for a tropical vibe.
Ingredients Section
- 1 cup unsalted butter, melted: Using unsalted butter gives you more control over the saltiness of the final product. Melt it slowly so it doesn’t brown.
- 2 cups graham cracker crumbs: You can buy pre-made crumbs or make your own by pulsing whole graham crackers in a food processor until they resemble fine sand.
- 2 cups powdered sugar: Also known as confectioners’ sugar, this fine powder dissolves easily, ensuring a smooth base.
- 1 ¼ cups creamy peanut butter: Divided for both the base and the topping. For best results, use a classic, no-stir creamy peanut butter like Jif or Skippy.
- 1 ½ cups semi-sweet chocolate chips: High-quality chocolate chips will give you a richer, smoother topping.
Potential Ingredient Substitutions:
- Graham Crackers: You can use crushed vanilla wafers or chocolate wafer cookies for a different flavor profile.
- Peanut Butter: Almond butter or cashew butter can be used, but the flavor will change significantly. For a similar taste, try using a classic peanut butter.
- Chocolate Chips: Milk chocolate chips will make the topping sweeter, while dark chocolate chips will give it a richer, more intense flavor.
Step-by-Step Instructions
Follow these simple, numbered steps to create your perfect no-bake bars.
- Prepare the base: In a large mixing bowl, combine the melted butter, graham cracker crumbs, powdered sugar, and 1 cup of creamy peanut butter. Mix everything together with a sturdy spatula or wooden spoon until it forms a uniform, thick mixture. This is a great arm workout! The mixture should be smooth and a bit sticky.
- Press into the pan: Line a 9×13-inch baking dish with parchment paper, leaving a little overhang on the sides to act as handles. This is a crucial step for easy removal. Pour the peanut butter mixture into the pan and use the back of a spatula or a flat-bottomed measuring cup to press it down firmly and evenly into the bottom of the pan, creating a smooth, compact layer.
- Melt the chocolate topping: In a microwave-safe bowl, combine the 1 ½ cups of semi-sweet chocolate chips and the remaining ¼ cup of creamy peanut butter. Microwave in 20-second intervals, stirring thoroughly after each interval. Continue until the chocolate is completely melted and the mixture is smooth and glossy. The peanut butter helps the chocolate stay soft and prevents it from cracking when you slice the bars.
- Top and chill: Pour the melted chocolate mixture over the peanut butter base, using a spatula to spread it evenly all the way to the edges. For a perfect finish, gently shake the pan to smooth the surface. Place the pan in the refrigerator and chill for 1-2 hours, or until the chocolate topping is completely firm and set. You’ll know it’s ready when you can press your finger gently on the chocolate and it doesn’t leave an indentation.
- Slice and serve: Use the parchment paper handles to carefully lift the entire slab of bars out of the pan and place it on a cutting board. For clean slices, run a sharp knife under hot water, dry it, and then slice the bars. Repeat this heating process for each cut. This will prevent the chocolate from cracking. Cut into 20 equal bars and serve.
If you enjoy simple, delicious no-bake desserts, you might also like this recipe for Caramel Coffee Fudge or the creamy, layered deliciousness of our Peanut Butter Crunch Lasagna. For a different kind of sweet treat, give the classic Red Velvet Brownies a try.
Frequently Asked Questions (FAQ)
Q: Can I use crunchy peanut butter?
A: Yes, you can! Using crunchy peanut butter will give the base a different texture and a bit of a nutty crunch. Just be aware that the base might not be as smooth as when using creamy peanut butter.
Q: Why is my chocolate topping cracking when I slice it?
A: This usually happens when the chocolate is too brittle. The addition of the peanut butter in the topping helps prevent this, but if it still cracks, it’s likely that the bars are too cold. Try letting them sit at room temperature for 5-10 minutes before slicing. Using a hot, dry knife for each cut is also a great way to get clean slices.
Q: How do I store leftovers?
A: Store the bars in an airtight container in the refrigerator for up to a week. They are best kept cold.
Q: Can I use a different size pan?
A: You can, but you may need to adjust the chilling time and the thickness of the bars. A smaller pan will result in thicker bars, which might need longer to set, while a larger pan will make thinner bars.
Q: Can I use natural peanut butter?
A: We recommend using a conventional, no-stir peanut butter (like Jif or Skippy) for this recipe. Natural peanut butter tends to be more oily, which can cause the base to become greasy and not hold its shape as well. If you must use it, make sure to mix it very well before adding it to the recipe.
No-Bake Peanut Butter Chocolate Bars
Ingredients
Method
- In a large mixing bowl, combine the melted butter, graham cracker crumbs, powdered sugar, and 1 cup of creamy peanut butter. Mix until uniform.
- Line a 9×13-inch baking dish with parchment paper, leaving overhang. Press the peanut butter mixture into the bottom of the pan evenly.
- In a microwave-safe bowl, combine chocolate chips and remaining ¼ cup of creamy peanut butter. Microwave in 20-second intervals, stirring, until melted and smooth.
- Pour the melted chocolate over the peanut butter base, spreading it evenly. Chill in the refrigerator for 1-2 hours until firm.
- Use the parchment paper to lift the bars out and slice them with a hot, dry knife into 20 equal pieces.