The Maillard Reaction and the Magic of Parmesan
The key to unlocking truly exceptional Parmesan Garlic Chicken Thighs lies in understanding a few fundamental scientific principles. First, we need to talk about the Maillard reaction. This is the chemical reaction between amino acids and reducing sugars that gives browned food its distinctive flavor. It’s responsible for the delicious crust on a perfectly seared steak, the golden hue of toasted bread, and, crucially, the irresistible browning of our chicken skin and Parmesan. High heat is essential for the Maillard reaction to occur efficiently. However, too much heat, or prolonged exposure to heat, leads to burning, especially with garlic, which contains delicate compounds that can quickly turn bitter. Next, consider the Parmesan itself. Real Parmesan cheese is packed with glutamates, naturally occurring amino acids that contribute to umami, that savory “fifth taste.” When heated, these glutamates intensify, boosting the overall flavor profile. Furthermore, Parmesan contains fat, which aids in browning and contributes to a richer, more satisfying mouthfeel. The trick is to use a good quality, finely grated Parmesan that will melt evenly and create a flavorful crust. Finally, the chicken thighs themselves. Thighs are naturally more forgiving than chicken breasts because they have a higher fat content, which helps them stay moist during cooking. This makes them ideal for high-heat cooking methods, allowing us to achieve crispy skin without drying out the meat. This contrasts with something like Garlic Parmesan Chicken Meatloaves, where the meatloaf mixture has to be carefully calibrated to stay moist.The Ultimate Parmesan Garlic Chicken Thighs Recipe
 Here’s the recipe I’ve perfected after countless experiments, designed to deliver consistent, mouthwatering results every time.
Ingredients:
- 4 boneless, skinless chicken thighs
- 2 tablespoons olive oil
- 4 cloves garlic, minced
- 1/2 cup finely grated Parmesan cheese
- 1/4 cup chopped fresh parsley
- 1 tablespoon lemon juice
- 1 teaspoon garlic powder
- 1/2 teaspoon onion powder
- 1/4 teaspoon red pepper flakes (optional)
- Salt and freshly ground black pepper to taste
Instructions:
- Prepare the Chicken: Pat the chicken thighs dry with paper towels. This is crucial for achieving crispy skin. Season generously with salt, pepper, garlic powder, and onion powder.
- Sear the Chicken: Heat olive oil in a large, oven-safe skillet over medium-high heat. Once the oil is shimmering, add the chicken thighs, skin-side down (if using skin-on thighs). Sear for 5-7 minutes, or until the skin is golden brown and crispy. Avoid overcrowding the pan; cook in batches if necessary.
- Flip and Cook: Flip the chicken thighs and cook for another 3-5 minutes, until lightly browned.
- Add Garlic and Parmesan: Reduce the heat to medium. Add the minced garlic to the skillet and cook for about 1 minute, until fragrant. Be careful not to burn the garlic. Sprinkle the Parmesan cheese evenly over the chicken thighs.
- Bake (if necessary): If the chicken is not fully cooked through (internal temperature of 165°F/74°C), transfer the skillet to a preheated oven at 375°F (190°C) and bake for 5-10 minutes, or until cooked through. This step helps melt the Parmesan beautifully.
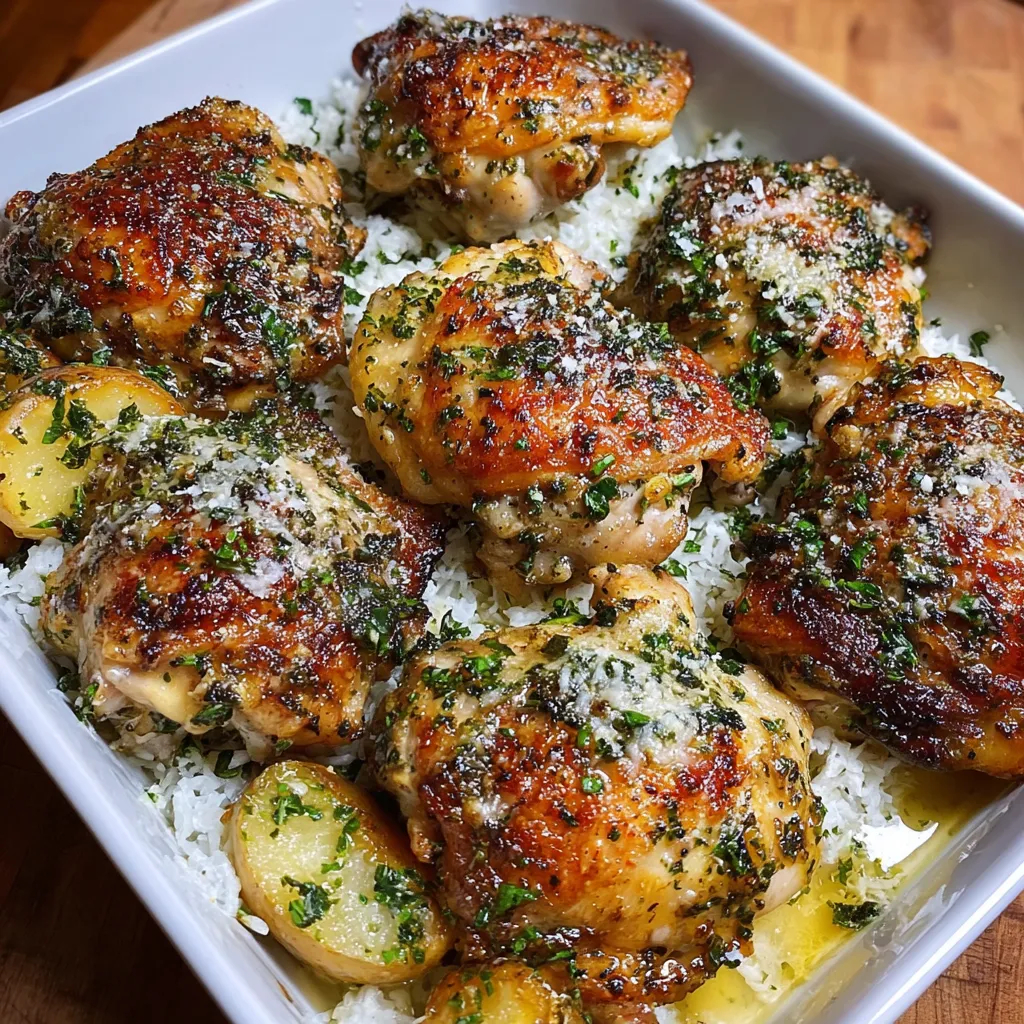
- Finish and Serve: Remove the skillet from the heat (or oven). Drizzle with lemon juice and sprinkle with fresh parsley and red pepper flakes (if using). Let the chicken rest for a few minutes before serving.
Serving Suggestions:
- Serve over rice, pasta, or mashed potatoes.
- Pair with a side of roasted vegetables or a simple salad.
- Garnish with extra Parmesan cheese and parsley.
My Parmesan Garlic Chicken Thighs Culinary Investigation
My quest for the perfect Parmesan Garlic Chicken Thighs was not without its challenges. My first few attempts were a disaster. The garlic invariably burned, leaving a bitter taste that overpowered everything else. The Parmesan often clumped up and refused to melt evenly, resulting in patchy, unappetizing coverage. And the chicken? Sometimes it was overcooked and dry, other times undercooked and…well, you get the picture.The Garlic Catastrophe
Like many of you, I initially thought that more garlic was always better. I piled it on, expecting an explosion of garlicky goodness. What I got instead was a burnt, acrid mess. Then, I had an “Aha!” moment: garlic is delicate! It needs gentle treatment. I learned to add it later in the cooking process, after the chicken had already browned, and to reduce the heat to prevent burning. Sautéing it briefly in the rendered chicken fat was the key to infusing the dish with its aromatic essence without turning it into a culinary weapon. Thinking about other chicken recipes I’ve made, like Hot Honey Feta Chicken, I realized that layering flavors at different stages of the cooking process is essential.The Parmesan Puzzle
The Parmesan was another hurdle. I tried using pre-shredded Parmesan, but it didn’t melt properly and often contained cellulose, which prevented it from browning. Then I switched to freshly grated Parmesan, which was a vast improvement. But even then, it sometimes clumped up. The solution? Finely grated Parmesan, and even distribution. A light dusting of Parmesan, allowed to melt and crisp, created a far more appealing and flavorful crust than a thick, uneven layer. The same principle applies even when making something completely different, like Ranch Garlic Parmesan Chicken Skewers.The Chicken Conundrum
Finally, the chicken itself. Achieving that perfect balance of crispy skin and juicy meat required some experimentation with cooking times and temperatures. I discovered that searing the chicken skin-side down first was crucial for rendering the fat and creating a golden-brown crust. And while I initially tried to cook the chicken entirely on the stovetop, I found that finishing it in the oven at a moderate temperature ensured that it cooked through evenly without drying out. I also experimented with different cuts of chicken, but boneless, skinless thighs consistently delivered the best results. It’s a different approach than a recipe like Chicken Thighs Dinner Recipe, where the focus might be on maximizing the flavor of the sauce, not necessarily achieving perfectly crispy skin.The Foolproof Parmesan Garlic Chicken Thighs Technique
After much trial and error, I’ve distilled the process down to a few key steps. Follow these, and you’ll be well on your way to Parmesan Garlic Chicken Thigh perfection.- Pat the chicken dry. This is non-negotiable. Dry chicken = crispy skin.
- Season generously. Don’t be shy with the salt, pepper, garlic powder, and onion powder. These seasonings enhance the flavor and help the chicken brown.
- Sear skin-side down. This renders the fat and creates a crispy crust. Use medium-high heat and don’t move the chicken until it’s properly browned.
- Add the garlic later. Sauté it briefly in the rendered chicken fat, but be careful not to burn it.
- Use finely grated Parmesan. Distribute it evenly over the chicken.
- Finish in the oven (if needed). This ensures that the chicken cooks through evenly without drying out.
- Rest before serving. This allows the juices to redistribute, resulting in more tender and flavorful chicken.
Why are chicken thighs recommended over chicken breasts for this recipe?
Chicken thighs are more forgiving than chicken breasts because they have a higher fat content, which helps them stay moist during high-heat cooking, allowing for crispy skin without drying out the meat.
What is the Maillard reaction, and why is it important for this recipe?
The Maillard reaction is a chemical reaction between amino acids and reducing sugars that gives browned food its distinctive flavor. It’s crucial for achieving the delicious crust on the chicken skin and browning the Parmesan cheese.
Why is it important to add the garlic later in the cooking process?
Garlic is delicate and can burn easily, leading to a bitter taste. Adding it later in the cooking process, after the chicken has browned, and reducing the heat prevents it from burning and allows its aromatic essence to infuse the dish.
What type of Parmesan cheese is recommended for this recipe, and why?
Finely grated, good quality Parmesan cheese is recommended. It melts evenly and creates a flavorful crust, unlike pre-shredded Parmesan which may not melt properly.
Parmesan Garlic Chicken Thighs Easy
Ingredients
Equipment
Method
- Prepare the Chicken: Pat the chicken thighs dry with paper towels. Season generously with salt, pepper, garlic powder, and onion powder.
- Sear the Chicken: Heat olive oil in a large, oven-safe skillet over medium-high heat. Once the oil is shimmering, add the chicken thighs, skin-side down (if using skin-on thighs). Sear for 5-7 minutes, or until the skin is golden brown and crispy. Avoid overcrowding the pan; cook in batches if necessary.
- Flip and Cook: Flip the chicken thighs and cook for another 3-5 minutes, until lightly browned.
- Add Garlic and Parmesan: Reduce the heat to medium. Add the minced garlic to the skillet and cook for about 1 minute, until fragrant. Be careful not to burn the garlic. Sprinkle the Parmesan cheese evenly over the chicken thighs.
- Bake (if necessary): If the chicken is not fully cooked through (internal temperature of 165°F/74°C), transfer the skillet to a preheated oven at 375°F (190°C) and bake for 5-10 minutes, or until cooked through. This step helps melt the Parmesan beautifully.
- Finish and Serve: Remove the skillet from the heat (or oven). Drizzle with lemon juice and sprinkle with fresh parsley and red pepper flakes (if using).
- Rest: Let the chicken rest for a few minutes before serving.