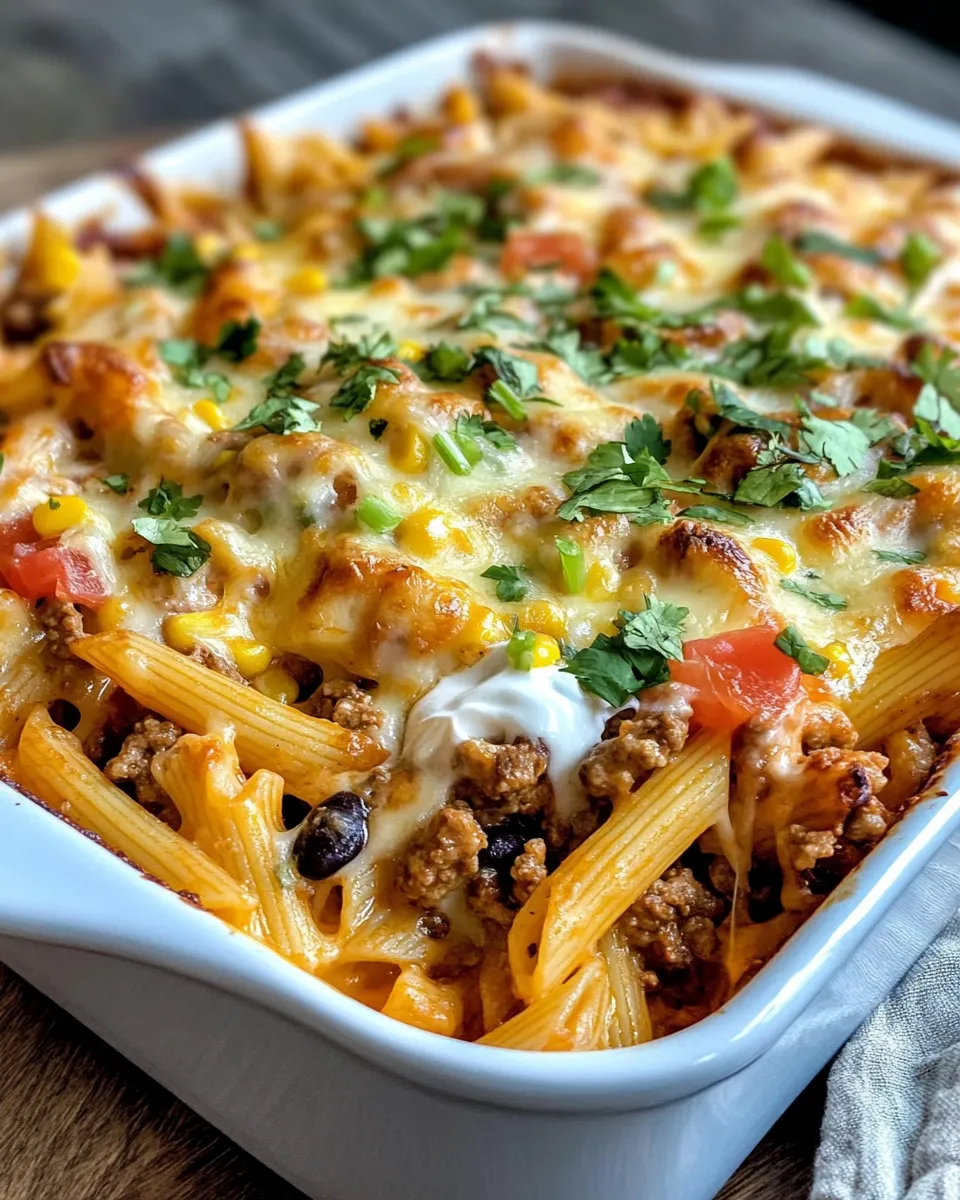
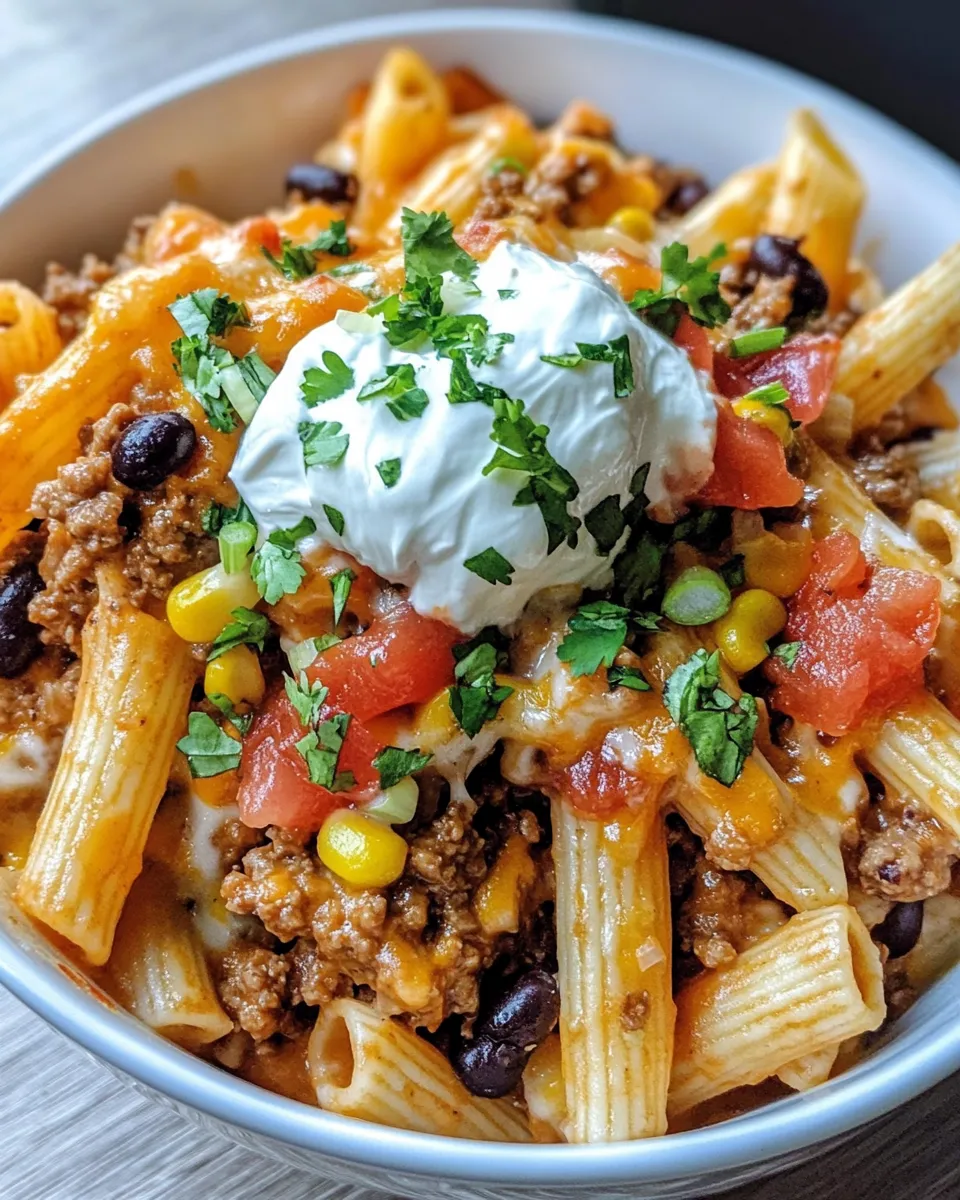
Taco night and pasta night are two of the most requested weeknight dinners in most households, and this recipe solves the problem of choosing between them. The cheesy loaded taco pasta bake combines taco-seasoned ground beef, salsa, Rotel, and sour cream with short pasta in a single baking dish, topped with Mexican cheese and crushed tortilla chips that bake into a golden, crunchy finish.
What makes this casserole work is the sour cream and salsa folded directly into the beef and pasta mixture before it goes into the oven. That combination keeps everything creamy and moist during the bake rather than drying out the way a standard tomato-based pasta casserole can. The salsa brings acidity and chunky texture, the Rotel adds heat and depth, and the sour cream rounds it all into something that stays cohesive through the full bake and reheats well through the week.
This loaded taco pasta bake feeds six from one dish in 40 minutes with minimal cleanup, and it’s the kind of casserole that gets finished completely at the table, which is always a reliable indicator that the recipe belongs in regular rotation.
Why You’ll Love This Loaded Taco Pasta Bake
The moisture problem that plagues most baked pasta casseroles is solved by the sour cream and salsa base. Both go in off heat after the beef is seasoned, which means the dairy doesn’t cook out or separate before the pasta goes in. The result is a casserole that comes out of the oven creamy and saucy rather than tight and dry.
The crushed tortilla chip topping adds a textural layer that no breadcrumb substitution can replicate. Added during the last 5 to 10 minutes of baking rather than at the start, they crisp into golden, slightly salty shards that contrast with the creamy pasta beneath.
The recipe also handles the fresh garnishes the right way, after baking rather than under the heat. Diced tomatoes, sliced jalapeños, green onions, and cilantro added immediately before serving keep their color, texture, and brightness rather than wilting into the cheese during the oven time.
This also freezes and reheats reliably, making it a practical double-batch recipe when you want a casserole ready for a busy week.
Ingredients for Cheesy Loaded Taco Pasta Bake
The ingredient list divides cleanly across the meat base, the creamy taco sauce, the cheese topping, and the fresh garnishes.
For the main components:
- 1 lb lean ground beef (90/10 or 93/7)
- 12 oz medium pasta shells or rotini
- 1 packet (1 oz) taco seasoning
- 1 small onion, finely diced
- 2 cloves garlic, minced
For the creamy taco sauce:
- 1 cup salsa, mild, medium, or chunky
- 1 can (10 oz) Rotel diced tomatoes with green chiles, undrained
- 1/2 cup sour cream or plain Greek yogurt
- 1 can (15 oz) black beans, rinsed and drained, optional
- 1 can (11 oz) Mexicorn, drained, optional
For the topping:
- 2 cups shredded Mexican-blend or cheddar cheese
- 1/2 cup tortilla chips, crushed
For fresh garnish after baking:
- Diced tomatoes, sliced jalapeños, green onions, fresh cilantro
For the pasta, medium shells are my first choice for this specific recipe. The concave shape scoops and holds the creamy taco sauce in every piece, which means you get sauce with every forkful rather than having it pool at the bottom of the dish. Rotini works equally well since the spiral grooves trap the sauce effectively. Both hold their shape through the oven bake better than smoother tube pastas when par-cooked to the right level of firmness.
For the beef, the leaner 90/10 or 93/7 works here because the salsa and sour cream provide the moisture that a fattier ground beef would otherwise contribute. With 80/20, you’d need to drain more thoroughly to prevent the casserole from becoming greasy, and the extra fat in the finished dish isn’t necessary given how rich the sauce already is.
The Rotel goes in undrained intentionally. The liquid from the can is part of the sauce base and contributes to the overall moisture level in the casserole. Draining it produces a noticeably drier result.
How to Make Cheesy Loaded Taco Pasta Bake
The sequence is designed so the pasta and the beef finish at roughly the same time and everything assembles quickly before going into the oven.
- Preheat the oven to 375°F. Grease a 9×13-inch baking dish and set it aside.
- Bring a large pot of generously salted water to a boil. Cook the pasta for 2 to 3 minutes less than the package directions indicate for al dente. The pasta will continue absorbing moisture from the sauce during the oven bake, so going in slightly underdone is what prevents the finished casserole from having overcooked, mushy noodles. Drain and set aside.
- While the pasta cooks, brown the ground beef and diced onion in a large skillet or Dutch oven over medium-high heat, breaking the beef into small crumbles. Cook until no pink remains. Drain any excess grease.
- Add the minced garlic and cook for 30 seconds, stirring constantly. Stir in the taco seasoning and the undrained can of Rotel. Simmer for 2 to 3 minutes until the seasoning has absorbed into the beef and the liquid from the Rotel has reduced slightly.
- Remove the skillet from heat. This step is important before adding the sour cream. Stirring cold sour cream into a pan that’s still on active high heat can cause it to curdle slightly at the edges rather than incorporating smoothly. Off heat, stir in the salsa, sour cream, black beans, and Mexicorn if using. The mixture will look thick at this point, which is correct.
- Add the drained pasta directly to the skillet and toss thoroughly until every piece is coated in the creamy taco sauce. The pasta will absorb some of the sauce immediately and the mixture will loosen slightly as the residual heat distributes. Taste for seasoning and add salt or pepper if needed.
- Pour the pasta mixture into the prepared baking dish and spread it evenly to the edges. Fold half the shredded cheese into the top layer of the pasta, pressing it slightly below the surface. Sprinkle the remaining cheese evenly across the top. Hold the crushed tortilla chips and add them in the final 5 to 10 minutes of baking rather than now for maximum crunch.
- Bake for 15 to 20 minutes until the cheese is fully melted and beginning to bubble. Add the crushed tortilla chips in an even layer across the top and return the dish to the oven for the final 5 to 10 minutes until the chips are golden and the cheese edges are lightly crisped.
- Remove from the oven and rest for 5 minutes before serving. Top generously with diced tomatoes, sliced jalapeños, green onions, and fresh cilantro immediately before bringing it to the table.
What to Serve with Cheesy Loaded Taco Pasta Bake
This is a rich, filling casserole that pairs best with lighter, fresher sides that cut through the cheese and sour cream.
Guacamole: A simple guacamole served alongside or dolloped directly over each serving adds cool creaminess and avocado richness that complements the taco flavors without duplicating anything already in the dish. It’s the most natural accompaniment for this casserole.
Lime-Cilantro Slaw: A quick coleslaw dressed with lime juice, olive oil, cilantro, and a pinch of salt adds crunch and acidity that contrasts beautifully with the richness of the baked cheese and sour cream. It comes together in about 5 minutes from bagged coleslaw mix.
Simple Black Bean Salad: A cold salad of rinsed black beans, corn, diced red onion, and lime vinaigrette keeps the Tex-Mex theme consistent while adding freshness and temperature contrast alongside the warm casserole.
Tortilla Chips and Salsa: The easiest addition that requires no prep and keeps the meal feeling casual and crowd-friendly. A good chunky salsa alongside mirrors the flavors already in the bake.
Simple Iceberg Wedge Salad: A cold wedge salad with a tangy dressing adds crunch and freshness that provides real contrast to a warm, saucy casserole. The cold temperature of the iceberg alongside the hot pasta bake is a satisfying combination.
Pro Tips & Variations
Add the tortilla chips late. The difference between chips added at the start of the bake and chips added in the final 5 to 10 minutes is dramatic. Early addition produces chips that absorb moisture from the sauce and turn soft and pale. Late addition produces golden, crunchy shards that hold their texture through serving.
Remove the pan from heat before stirring in sour cream. Sour cream added to an actively hot pan separates more easily than sour cream stirred into a pan that has just been pulled off the burner. The residual heat is enough to incorporate it smoothly without the curdling that can happen at higher temperatures.
Fold half the cheese into the pasta rather than only layering on top. A layer of cheese mixed into the top of the pasta before the surface cheese goes on ensures that each serving has melted cheese distributed through the interior rather than only a cheese crust on top. It takes about 10 extra seconds and makes every scoop from the dish better.
Use chunky salsa for more texture. A smooth or blended salsa produces a more uniform sauce that blends into the background. A chunky salsa with visible tomato, pepper, and onion pieces maintains more distinct texture in the finished casserole and makes every bite feel more loaded.
Make it vegetarian. Extra black beans, a drained can of pinto beans, and sautéed mushrooms or a plant-based ground meat substitute work well in place of the ground beef. The taco seasoning, salsa, and Rotel carry the flavor profile just as effectively without the meat.

Storage & Reheating Tips
Store leftovers in an airtight container in the refrigerator for up to 4 days. The pasta continues to absorb moisture from the sauce during storage and the casserole becomes more cohesive on day two, though slightly denser than it is fresh. The tortilla chip topping will soften completely during storage, which is unavoidable.
To reheat individual portions, I add a small dollop of sour cream or a splash of water directly onto the portion before microwaving at medium power in 60-second intervals. This restores the creaminess that the pasta absorbs during storage. For reheating a larger portion, cover with foil and warm in the oven at 325°F for about 20 minutes, removing the foil for the last 5 minutes.
For freezing, portion the casserole into individual freezer-safe containers before freezing for up to 2 months. Leave the fresh garnishes off any portions intended for freezing. Thaw overnight in the refrigerator and reheat with a splash of liquid added before warming.
Common Questions
My pasta turned out mushy after baking. What happened? This comes down to not undercooking the pasta enough before it goes into the dish. The pasta needs to be meaningfully firm, bordering on slightly chalky in the center, when it comes out of the boiling water. If you cook it to a standard al dente before baking, the additional oven time pushes it past that point. Aim to pull it 2 to 3 full minutes before the package’s al dente time.
The casserole looks dry when I reheat it. How do I fix it? The pasta absorbs a significant amount of moisture from the sauce during storage. Adding a tablespoon of sour cream or a splash of water to the portion before reheating and covering it while it heats is the simplest fix. Stirring once halfway through the reheat redistributes the added moisture evenly.
Can I make this ahead and refrigerate it before baking? Yes, with a small timing adjustment. Assemble the casserole fully through the cheese layer, cover tightly, and refrigerate for up to 24 hours before baking. Pull it from the refrigerator 20 minutes before baking to take the chill off, then bake covered with foil for the first 15 minutes and uncovered for the remaining time. Add the tortilla chips in the final 5 to 10 minutes as usual.
Cheesy loaded taco pasta bake is the kind of casserole that disappears completely at the dinner table, which is the most reliable indicator that a recipe is worth keeping. The sour cream and salsa base keeps it creamy through the bake, the chip topping adds the crunch that every good taco-inspired dish needs, and the fresh garnishes added right before serving bring brightness that makes the whole thing taste more considered than a straightforward weeknight casserole has any right to.
Cheesy Loaded Taco Pasta Bake
Ingredients
Equipment
Method
- Preheat oven to 375°F (190°C). Grease a 9×13-inch baking dish.
- Cook the pasta in generously salted boiling water for 2 to 3 minutes less than the package al dente time. The pasta should be firm and slightly chalky in the center. Drain and set aside.
- Brown the ground beef and diced onion in a large skillet over medium-high heat, breaking into small crumbles, until no pink remains. Drain excess grease.
- Add the minced garlic and cook for 30 seconds. Stir in the taco seasoning and undrained Rotel. Simmer for 2 to 3 minutes.
- Remove the skillet from heat. Stir in the salsa, sour cream, black beans, and Mexicorn if using until fully combined.
- Add the drained pasta and toss until evenly coated. Taste and adjust seasoning.
- Pour the pasta mixture into the prepared baking dish. Fold half the shredded cheese into the top layer of pasta. Sprinkle the remaining cheese evenly across the surface.
- Bake for 15 to 20 minutes until the cheese is melted and bubbling. Add the crushed tortilla chips in an even layer and return to the oven for a final 5 to 10 minutes until the chips are golden.
- Rest for 5 minutes. Top with diced tomatoes, sliced jalapeños, green onions, and fresh cilantro immediately before serving.