The Science of Succulent: Binding and Flavor
The secret to a truly great meatloaf, regardless of the protein used, lies in understanding the science behind binding and flavor infusion. Binding agents, typically breadcrumbs and eggs, are crucial for holding the meatloaf together, preventing it from crumbling during and after cooking. Breadcrumbs absorb excess moisture, while eggs provide protein that coagulates upon heating, creating a cohesive structure. The ratio of these ingredients to the meat is paramount. Too few binding agents, and the meatloaf will fall apart; too many, and it will become dense and rubbery. Flavor infusion, on the other hand, is all about maximizing the impact of your chosen ingredients. In this case, garlic and parmesan cheese are the stars. Garlic’s pungent flavor compounds are best released when minced or crushed, allowing them to permeate the entire meatloaf. Parmesan, with its salty, umami-rich profile, not only adds depth of flavor but also contributes to the meatloaf’s moisture retention, preventing it from drying out. The addition of herbs, like parsley or Italian seasoning, provides brightness and complexity, balancing the richness of the cheese and garlic.The Recipe: Garlic Parmesan Chicken Meatloaf Perfection

Ingredients:
- 2 lbs ground chicken
- 1 cup grated Parmesan cheese, divided
- 1 cup breadcrumbs (panko or Italian-style)
- 2 large eggs, lightly beaten
- 4 cloves garlic, minced
- 1/4 cup chopped fresh parsley (or 2 tablespoons dried Italian seasoning)
- 1/4 cup milk
- 1 tablespoon olive oil
- 1 teaspoon salt
- 1/2 teaspoon black pepper
- Optional Glaze: 2 tablespoons melted butter, 2 cloves minced garlic, 1/4 cup grated Parmesan cheese
Equipment:
- Large mixing bowl
- 9×5 inch loaf pan
- Measuring cups and spoons
- Cutting board
- Knife
- Oven
Instructions:
1. Preheat the Oven: Preheat your oven to 375°F (190°C). Lightly grease a 9×5 inch loaf pan. 2. Sauté the Garlic: Heat olive oil in a small skillet over medium heat. Add minced garlic and sauté for 1-2 minutes, or until fragrant. Be careful not to burn the garlic. 3. Combine Wet Ingredients: In a large mixing bowl, combine the beaten eggs, milk, and sautéed garlic (including the oil). 4. Combine Dry Ingredients: Add breadcrumbs, 3/4 cup of the Parmesan cheese, parsley (or Italian seasoning), salt, and pepper to the bowl. Mix well to combine. 5. Incorporate the Chicken: Gently add the ground chicken to the bowl. Using your hands or a wooden spoon, mix the ingredients together until just combined. Be careful not to overmix, as this can result in a tough meatloaf. 6. Shape the Meatloaf: Transfer the mixture to the prepared loaf pan and gently press it down to create an even surface. 7. Bake: Bake in the preheated oven for 50-60 minutes, or until the internal temperature reaches 165°F (74°C). Use a meat thermometer to ensure accuracy. 8. Optional Glaze (Last 10 Minutes): While the meatloaf is baking, prepare the glaze. In a small bowl, combine melted butter, minced garlic, and the remaining 1/4 cup of Parmesan cheese. During the last 10 minutes of baking, spread the glaze evenly over the top of the meatloaf. 9. Rest: Remove the meatloaf from the oven and let it rest in the pan for 10-15 minutes before slicing and serving. This allows the juices to redistribute, resulting in a more moist and flavorful meatloaf.My Meatloaf Odyssey: A Culinary Investigation
The Initial Disaster: Dryness and Disintegration
My first few attempts at creating the ultimate Garlic Parmesan Chicken Meatloaf were a disaster. Like many of you, I initially thought that ground chicken, being leaner than ground beef, would automatically translate to a healthier and equally delicious meatloaf. My first versions, however, were dry, crumbly, and lacked the rich, savory flavor I was aiming for. They fell apart the moment I tried to slice them. I even considered giving up and just making Chicken Thighs Dinner instead!Breadcrumb Battles: Finding the Right Binder
The first problem I tackled was the binding. I experimented with different types of breadcrumbs – regular, panko, and Italian-style – and varying amounts. Regular breadcrumbs proved too dense, while too little of any kind resulted in a meatloaf that simply wouldn’t hold together. Then, I had an “Aha!” moment: Italian-style breadcrumbs, with their added herbs and seasonings, not only provided better binding but also contributed to the overall flavor profile. Combining this with the right amount of egg was key.Garlic Galore: Maximizing Flavor Without Burning
Next, I focused on the garlic. I initially added raw minced garlic directly to the meatloaf mixture. While the garlic flavor was present, it was often harsh and unevenly distributed. Sautéing the garlic in olive oil before adding it to the mixture proved to be a game-changer. This mellowed the garlic’s bite and infused the oil with its flavor, ensuring a more uniform and nuanced garlic presence throughout the meatloaf. I also realized that freshly minced garlic was far superior to pre-minced garlic in a jar.Parmesan Power: The Secret Weapon
Parmesan cheese was another crucial element. I initially used a small amount, fearing it would make the meatloaf too salty. However, I quickly realized that parmesan wasn’t just about salt; it was about umami, that savory fifth taste that adds depth and richness. Increasing the amount of parmesan significantly improved the flavor and moisture retention. The optional glaze I developed, brushed on during the last 10 minutes of baking, adds another layer of flavor and a beautiful golden-brown finish. Maybe next time, I’ll add some in Cheesy Garlic Chicken Wraps!The Final Triumph: A Juicy, Flavorful Masterpiece
After numerous iterations, I finally achieved meatloaf nirvana. The perfect balance of binding agents, the sautéed garlic’s mellowed intensity, the parmesan’s umami richness, and the optional glaze’s finishing touch transformed my Garlic Parmesan Chicken Meatloaf into a truly exceptional dish. It’s now a family favorite, and I’m confident it will become one of yours too! It pairs wonderfully with mashed potatoes or roasted vegetables. In fact, it is probably better than Meatloaf Mash!The Technique: Your Foolproof Guide to Garlic Parmesan Chicken Meatloaf
Follow these steps for meatloaf success, every time:- Don’t Overmix: Gently combine the ingredients until just combined. Overmixing leads to a tough meatloaf.
- Sauté the Garlic: Sautéing mellows the garlic’s flavor and infuses the oil, ensuring even distribution.
- Use Italian-Style Breadcrumbs: They provide better binding and added flavor.
- Don’t Skimp on Parmesan: It adds umami and moisture.
- Use a Meat Thermometer: Ensure the meatloaf reaches an internal temperature of 165°F (74°C) for safety and doneness.
- Let it Rest: Allow the meatloaf to rest for 10-15 minutes after baking to redistribute the juices and prevent it from drying out.
Why is it important to sauté the garlic before adding it to the meatloaf?
Sautéing the garlic in olive oil mellows its harshness and infuses the oil with its flavor, ensuring a more uniform and nuanced garlic presence throughout the meatloaf.
What is the purpose of breadcrumbs and eggs in the Garlic Parmesan Chicken Meatloaf recipe?
Breadcrumbs and eggs act as binding agents. Breadcrumbs absorb excess moisture, while eggs provide protein that coagulates upon heating, creating a cohesive structure and preventing the meatloaf from crumbling.
What type of breadcrumbs are recommended for this recipe, and why?
Italian-style breadcrumbs are recommended because they provide better binding and contribute to the overall flavor profile due to their added herbs and seasonings.
Why is it important to let the meatloaf rest after baking?
Resting the meatloaf for 10-15 minutes after baking allows the juices to redistribute, resulting in a more moist and flavorful meatloaf.

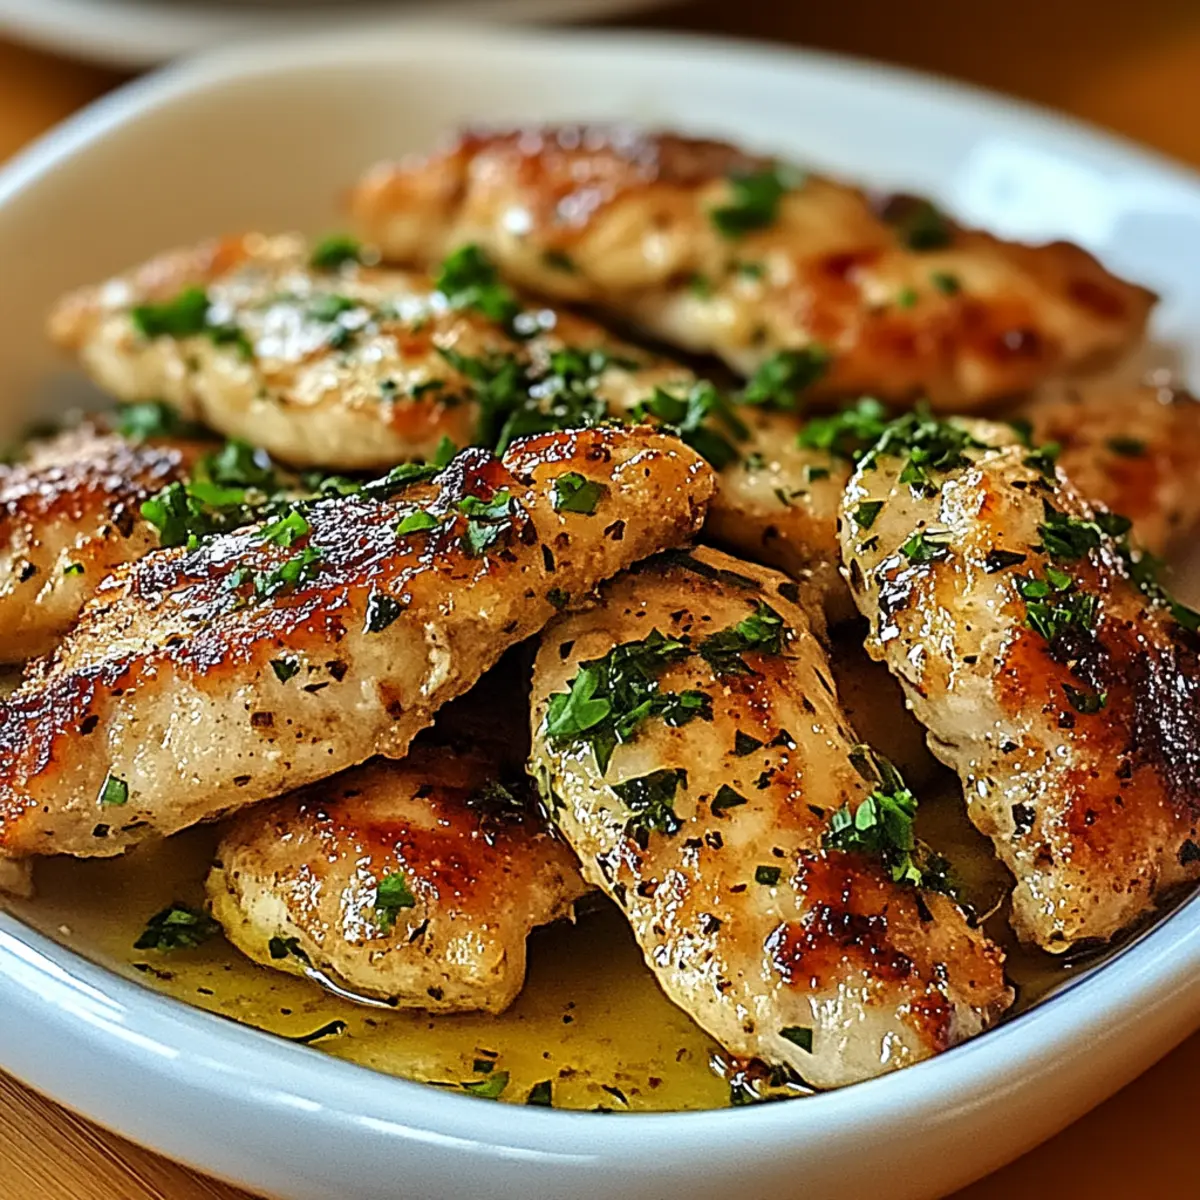
BEST Garlic Parmesan Chicken Meatloaves
This recipe transforms humble meatloaf into a gourmet dish with the irresistible flavors of garlic and parmesan. Made with ground chicken for a lighter, healthier twist, it’s perfect for a weeknight meal or a dinner party. The optional glaze adds another layer of flavor and a beautiful golden-brown finish.
Ingredients
Equipment
Method
- Preheat the Oven: Preheat your oven to 375°F (190°C). Lightly grease a 9×5 inch loaf pan.
- Sauté the Garlic: Heat olive oil in a small skillet over medium heat. Add minced garlic and sauté for 1-2 minutes, or until fragrant. Be careful not to burn the garlic.
- Combine Wet Ingredients: In a large mixing bowl, combine the beaten eggs, milk, and sautéed garlic (including the oil).
- Combine Dry Ingredients: Add breadcrumbs, 3/4 cup of the Parmesan cheese, parsley (or Italian seasoning), salt, and pepper to the bowl. Mix well to combine.
- Incorporate the Chicken: Gently add the ground chicken to the bowl. Using your hands or a wooden spoon, mix the ingredients together until just combined. Be careful not to overmix, as this can result in a tough meatloaf.
- Shape the Meatloaf: Transfer the mixture to the prepared loaf pan and gently press it down to create an even surface.
- Bake: Bake in the preheated oven for 50-60 minutes, or until the internal temperature reaches 165°F (74°C). Use a meat thermometer to ensure accuracy.
- Optional Glaze (Last 10 Minutes): While the meatloaf is baking, prepare the glaze. In a small bowl, combine melted butter, minced garlic, and the remaining 1/4 cup of Parmesan cheese. During the last 10 minutes of baking, spread the glaze evenly over the top of the meatloaf.
- Rest: Remove the meatloaf from the oven and let it rest in the pan for 10-15 minutes before slicing and serving. This allows the juices to redistribute, resulting in a more moist and flavorful meatloaf.
Notes
Don’t overmix the ingredients to avoid a tough meatloaf. Sautéing the garlic mellows its flavor and infuses the oil for even distribution. Italian-style breadcrumbs provide better binding and added flavor. Use a meat thermometer to ensure the meatloaf reaches an internal temperature of 165°F (74°C) for safety and doneness. Let the meatloaf rest for 10-15 minutes after baking to redistribute the juices and prevent it from drying out. Store leftovers in an airtight container in the refrigerator for up to 3 days.