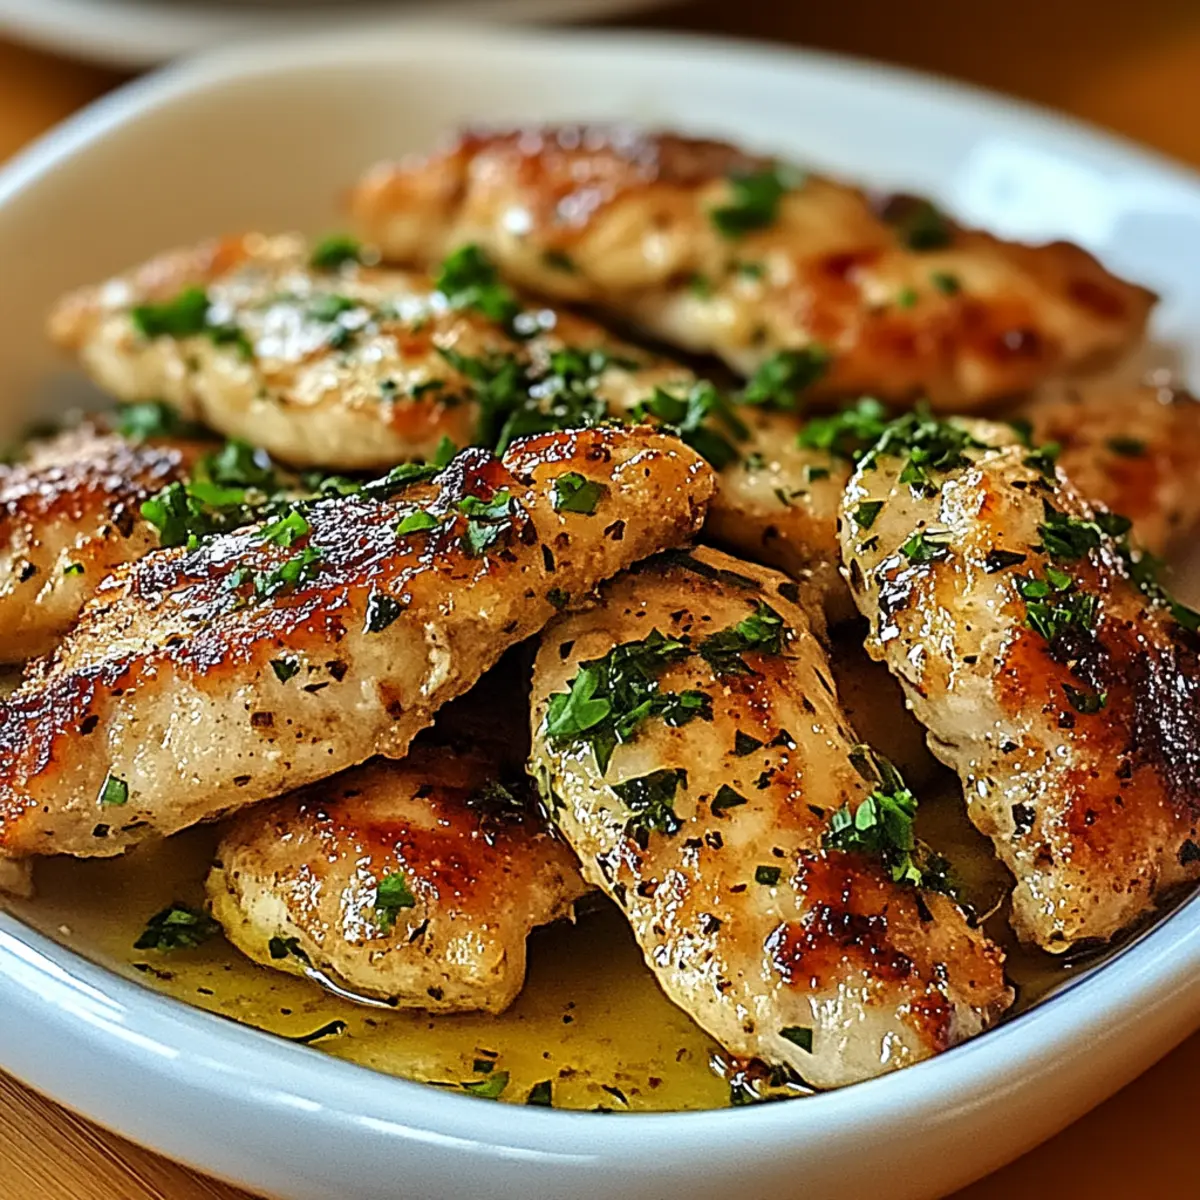
Perfect for those nights when you want something impressive but don’t have hours to spend in the kitchen, this baked caesar chicken recipe transforms everyday ingredients into a restaurant-worthy dinner. Tender chicken breasts get smothered in a creamy Caesar-Parmesan sauce, then topped with golden, buttery breadcrumbs that add the perfect crunch. The best part? It all comes together in one baking dish with just 15 minutes of prep work.
This recipe takes the beloved flavors of Caesar salad and reimagines them as a complete main course. The creamy sauce keeps the chicken incredibly moist while the crispy topping adds texture that makes every bite interesting. Whether you’re cooking for family on a Tuesday or entertaining friends on the weekend, this dish delivers without demanding much of your time.
Why You’ll Love This Baked Caesar Chicken Recipe
Everything happens in one baking dish, which means cleanup is minimal even though the flavors are complex. The combination of Caesar dressing and sour cream creates a sauce that’s tangy, creamy, and rich without being heavy. That crispy Parmesan breadcrumb topping provides contrast against the tender chicken and velvety sauce.
This recipe is incredibly forgiving for busy cooks. You can prep the chicken and sauce ahead of time, then just pop it in the oven when dinner time approaches. The Caesar dressing does most of the flavoring work, so you don’t need to measure out a dozen different seasonings. Chicken breasts stay juicy thanks to the protective coating of sauce and cheese.
Kids who normally resist “fancy” food tend to love this because the flavors are familiar and comforting. The dish works equally well for casual weeknight dinners and special occasions when you want to impress without stress. At under $20 for four servings, it’s budget-friendly enough to make regularly.
Ingredients for Baked Caesar Chicken with Creamy Parmesan Sauce
I prefer using panko breadcrumbs over regular breadcrumbs because they create a lighter, crispier topping that doesn’t get soggy. Fresh grated Parmesan makes a real difference here—the pre-shredded stuff doesn’t melt as smoothly and can taste grainy.
- 4 pieces boneless, skinless chicken breasts
- 1 cup Caesar dressing
- 1/2 cup sour cream
- 1 cup grated Parmesan cheese, divided
- 1/2 teaspoon black pepper
- 1 cup panko breadcrumbs or croutons, crushed
- 2 tablespoons melted butter
- Salt, to taste
Caesar dressing quality matters: Choose a dressing with visible Parmesan flecks and a creamy consistency. The dressing is the star of the sauce, so pick one you’d actually enjoy on a salad. I use brands with anchovies listed in the ingredients for more authentic Caesar flavor.
Chicken preparation: Look for chicken breasts that are similar in size so they cook at the same rate. If you can only find large breasts, consider cutting them in half horizontally to create thinner cutlets. This reduces cooking time and ensures the chicken doesn’t dry out.
Sour cream substitution: Full-fat sour cream creates the richest sauce, but Greek yogurt works if you prefer. The yogurt adds tanginess and keeps things a bit lighter. Avoid fat-free versions as they can separate during baking.
Breadcrumb options: Panko gives you the crispiest topping, but crushed Caesar salad croutons add an extra layer of flavor since they’re already seasoned. Regular breadcrumbs work too, though the texture won’t be quite as light.
How to Make Baked Caesar Chicken
The technique here is straightforward, but a few key steps ensure perfectly cooked, juicy chicken every time. Pounding the breasts to even thickness is the most important prep step you can do.
1. Prepare the oven and pan. Preheat your oven to 375°F. Spray a 9×13 inch baking dish generously with nonstick cooking spray, making sure to coat the corners and sides. This prevents the creamy sauce from sticking and makes cleanup easier.
2. Even out the chicken. Place each chicken breast between two sheets of plastic wrap or parchment paper. Use a meat mallet or heavy skillet to gently pound the thicker end of each breast until the entire piece is 3/4 to 1 inch thick throughout. This step is crucial—uneven chicken means some parts overcook while others stay undercooked. The pounding also tenderizes the meat slightly.
3. Season and arrange. Sprinkle both sides of each chicken breast with 1/2 cup of the grated Parmesan cheese, the black pepper, and a light pinch of salt. Don’t overdo the salt since both the Caesar dressing and Parmesan are already salty. Arrange the seasoned breasts in the prepared baking dish with a bit of space between each piece if possible.
4. Make the creamy sauce. In a small bowl, whisk together the Caesar dressing and sour cream until completely smooth with no lumps. The mixture should be pourable but thick enough to coat the back of a spoon. Pour this sauce over each chicken breast, using a spoon or spatula to spread it evenly across the top and sides. Sprinkle the remaining 1/2 cup of Parmesan cheese over the sauce layer.
5. Initial bake. Place the baking dish in the preheated oven and bake uncovered for 20 minutes. The chicken should be mostly cooked through at this point, and the sauce will be bubbling gently around the edges.
6. Prepare the topping. While the chicken bakes, melt the butter in a small bowl. Add the panko breadcrumbs or crushed croutons and stir until all the crumbs are coated with butter. For extra flavor, mix in a tablespoon of Parmesan, a pinch of black pepper, or 1/4 teaspoon of garlic powder.
7. Add the crunchy layer. Remove the baking dish from the oven after 20 minutes. Sprinkle the buttered breadcrumb mixture evenly over the top of each chicken breast, creating a uniform layer that covers the sauce. Return the dish to the oven and bake for another 10 minutes.
8. Broil for golden perfection. Switch your oven to the broil setting. Move the baking dish to a rack positioned about 6 inches from the broiler element. Broil for 1-2 minutes, watching constantly, until the breadcrumb topping turns golden brown. The line between perfectly golden and burnt is thin, so don’t walk away during this step.
9. Rest before serving. Remove the dish from the oven and loosely tent it with aluminum foil. Let the chicken rest for 5-10 minutes. This resting period allows the juices to redistribute throughout the meat, ensuring each bite stays moist. The residual heat also finishes cooking the chicken gently without drying it out.
What to Serve with Baked Caesar Chicken
This rich, creamy chicken calls for lighter sides that won’t compete with the bold flavors but will round out the meal nicely.
Classic Caesar Salad: Keep the theme going with a crisp Caesar salad on the side. The cool, crunchy romaine contrasts beautifully with the warm, tender chicken. Use the same dressing you used in the recipe for consistency.
Garlic Roasted Vegetables: Roasted broccoli, asparagus, or green beans tossed with olive oil and garlic add color and nutrition. The slight char from roasting complements the creamy chicken without adding more richness.
Buttered Egg Noodles: Simple egg noodles tossed with butter and parsley soak up the extra sauce from the chicken. Cook them while the chicken bakes so everything finishes at the same time.
Mashed Potatoes: Creamy mashed potatoes pair wonderfully with the Caesar sauce, creating an indulgent comfort food dinner. For a lighter option, try mashed cauliflower instead.
Crusty Bread: A warm baguette or garlic bread is perfect for mopping up every drop of that creamy Parmesan sauce. Toast thick slices under the broiler while the chicken rests.
Rice Pilaf: Fluffy rice pilaf with herbs provides a neutral base that lets the chicken shine. The rice absorbs the sauce beautifully, making sure nothing goes to waste.
Pro Tips & Variations
Check internal temperature: Use an instant-read thermometer to ensure the chicken reaches 165°F at the thickest part. This guarantees food safety while preventing overcooking. Insert the thermometer horizontally into the center of the breast.
Make it ahead: Assemble the dish completely through step 4, cover tightly with plastic wrap, and refrigerate for up to 24 hours. When ready to cook, let it sit at room temperature for 20 minutes, then bake as directed, adding 5 extra minutes to the initial baking time.
Double the recipe: This scales beautifully for a crowd. Use two 9×13 inch dishes or one large roasting pan. You may need to add 5-10 minutes to the cooking time for a very full pan.
Add vegetables: Layer thinly sliced tomatoes, spinach, or sun-dried tomatoes under the chicken before adding the sauce. They’ll cook down and add extra flavor and nutrition.
Gluten-free option: Swap the panko for gluten-free breadcrumbs or crushed gluten-free crackers. Almond flour mixed with Parmesan also creates a tasty, low-carb topping.
Boost the garlic: Mix 2 minced garlic cloves into the Caesar-sour cream sauce for more pronounced garlic flavor. Fresh garlic adds a punch that enhances the overall dish.
Try different proteins: This preparation works equally well with boneless pork chops or thick white fish fillets like cod or halibut. Adjust cooking times accordingly—fish will need less time, about 15-18 minutes total.
Extra crispy topping: After broiling, if you want even more crunch, drizzle the breadcrumb layer with an additional tablespoon of melted butter before the final broil. Watch closely to prevent burning.
Storage & Reheating Tips
Store leftover chicken in an airtight container in the refrigerator for up to 3 days. Keep the sauce and topping with the chicken rather than separating them, as this helps maintain moisture.
For best results when reheating, use the oven rather than the microwave. Preheat your oven to 350°F, place the chicken in a baking dish, cover loosely with foil, and warm for 15-20 minutes until heated through. Remove the foil for the last 5 minutes to re-crisp the topping slightly.
Microwave reheating works in a pinch but the breadcrumb topping will soften. Place chicken on a microwave-safe plate, cover with a damp paper towel, and heat in 30-second intervals until warm throughout.
Freezing is possible but not ideal since the creamy sauce can separate slightly when thawed. If you do freeze, wrap individual portions tightly in plastic wrap, then foil, and freeze for up to 2 months. Thaw overnight in the refrigerator before reheating as directed above.
Common Questions
Can I use chicken thighs instead of breasts? Absolutely. Boneless, skinless chicken thighs work beautifully in this recipe. They’re more forgiving than breasts since they contain more fat and won’t dry out as easily. Use the same baking time and temperature, checking that the internal temperature reaches 165°F.
What if I don’t have sour cream? Greek yogurt is the best substitute, offering similar tanginess and creaminess. Cream cheese softened and thinned with a tablespoon of milk also works. Mayo can substitute in a pinch, though the flavor will be slightly different.
How do I know when the chicken is done? The most reliable method is using an instant-read thermometer inserted into the thickest part of the breast. It should read 165°F. Visual cues include clear juices running from the chicken and opaque white meat with no pink remaining.
Can I make this dairy-free? It’s challenging since dairy is central to the recipe. You could try dairy-free Caesar dressing with cashew cream instead of sour cream and nutritional yeast instead of Parmesan, but the flavor profile will change significantly.
Why is my topping soggy? This usually happens if the breadcrumbs aren’t properly coated with butter or if you skip the broiling step. Make sure every crumb gets butter, and always finish with that quick broil to crisp everything up.
This baked caesar chicken recipe proves that weeknight dinners can be both simple and special. The creamy Parmesan sauce and crunchy topping transform ordinary chicken breasts into something memorable, all while keeping your time in the kitchen to a minimum. This one’s definitely worth adding to your regular rotation.

Baked Caesar Chicken with Creamy Parmesan Sauce
Ingredients
Equipment
Method
- Preheat your oven to 375°F. Spray a 9×13 inch baking dish generously with nonstick cooking spray, coating the corners and sides.
- If chicken breasts are uneven in thickness, place each between two sheets of plastic wrap or parchment paper. Use a meat mallet or heavy skillet to gently pound the thicker end until the entire piece is 3/4 to 1 inch thick throughout.
- Sprinkle both sides of each chicken breast with 1/2 cup of the grated Parmesan cheese, black pepper, and a light pinch of salt. Arrange the seasoned breasts in the prepared baking dish with space between each piece if possible.
- In a small bowl, whisk together the Caesar dressing and sour cream until completely smooth. Pour this sauce over each chicken breast, using a spoon to spread it evenly across the top and sides. Sprinkle the remaining 1/2 cup of Parmesan cheese over the sauce layer.
- Bake uncovered for 20 minutes. The chicken should be mostly cooked through and the sauce will bubble gently around the edges.
- While the chicken bakes, melt the butter in a small bowl. Add the panko breadcrumbs or crushed croutons and stir until all crumbs are coated. For extra flavor, mix in additional Parmesan, black pepper, or garlic powder if desired.
- After 20 minutes, remove the baking dish from the oven. Sprinkle the buttered breadcrumb mixture evenly over the top of each chicken breast, creating a uniform layer.
- Return the dish to the oven and bake for an additional 10 minutes.
- Switch the oven to broil. Position the baking dish about 6 inches from the broiler element. Broil for 1-2 minutes, watching constantly, until the breadcrumb topping turns golden brown.
- Remove from oven and loosely tent with aluminum foil. Let the chicken rest for 5-10 minutes before serving to allow juices to redistribute.