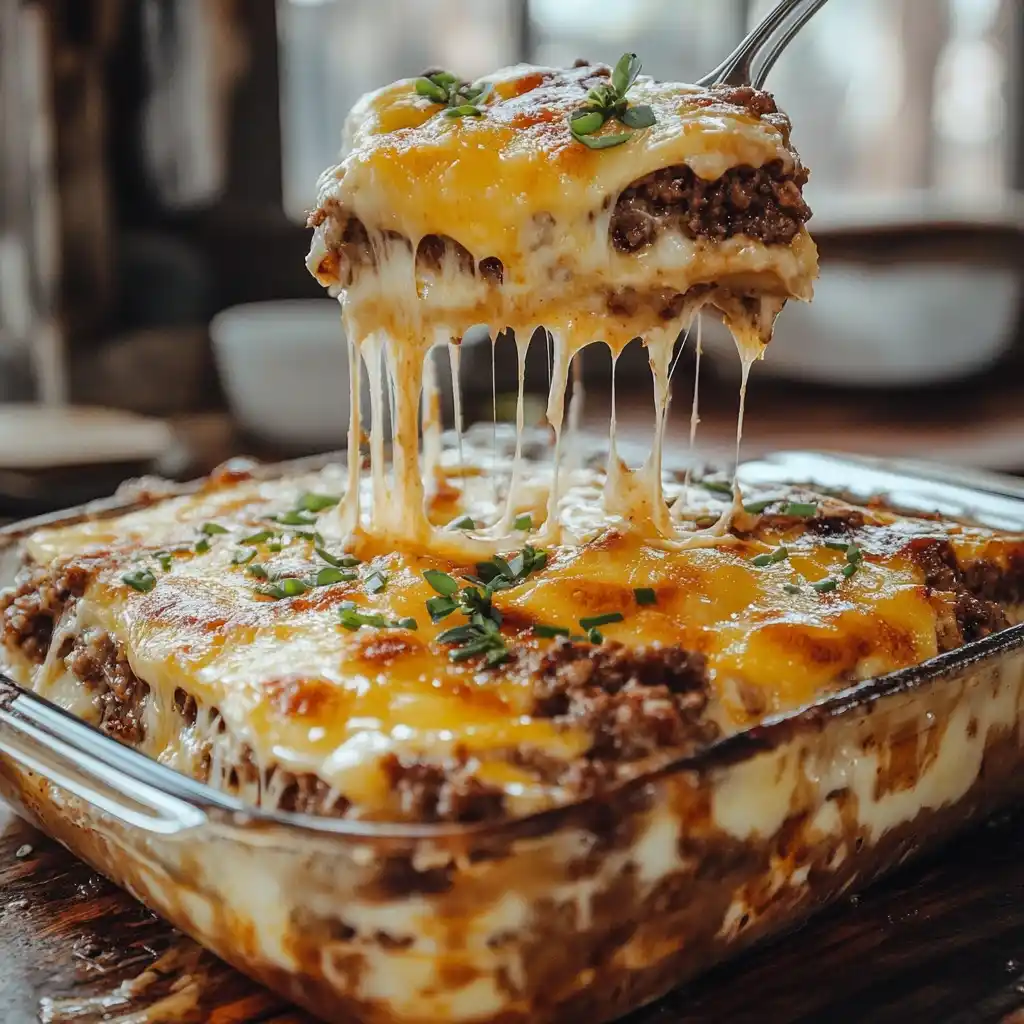
Some recipes earn their reputation not from technique or refinement, but from sheer, crowd-pleasing satisfaction. The cattle drive casserole is one of those dishes. Known in some circles as the John Wayne Casserole, it’s been a staple of church potlucks, family reunions, and weeknight tables for decades, and for good reason. Every layer earns its place, from the pillowy biscuit base to the taco-spiced beef to the tangy sour cream and mayo topping that settles into the layers below as it bakes.
What makes this casserole work is the contrast between those layers. The biscuit base stays soft and doughy beneath the weight of the filling while the edges crisp against the pan. The beef carries the heat and spice of the taco seasoning. The creamy topping balances everything with tang from the sour cream, richness from the cheddar, and a mild chile heat that runs through every bite. Together they produce something that tastes more cohesive than the ingredient list might suggest.
This cattle drive casserole feeds eight to ten people from a single 9×13-inch dish, reheats well the next day, and requires nothing in the way of advanced technique. It’s built for exactly the kind of occasion where you need a guaranteed crowd-pleaser without a complicated evening in the kitchen.
Why You’ll Love This Cattle Drive Casserole
The layered construction means every serving gets something from every component. There’s no digging around for the good parts because the biscuit, beef, and creamy topping are stacked together in every slice.
It’s genuinely simple to put together. The biscuit base takes about two minutes to mix. The beef layer comes together in a single skillet while the oven preheats. The creamy topping is a one-bowl whisk. The whole dish is assembled and in the oven within 15 minutes.
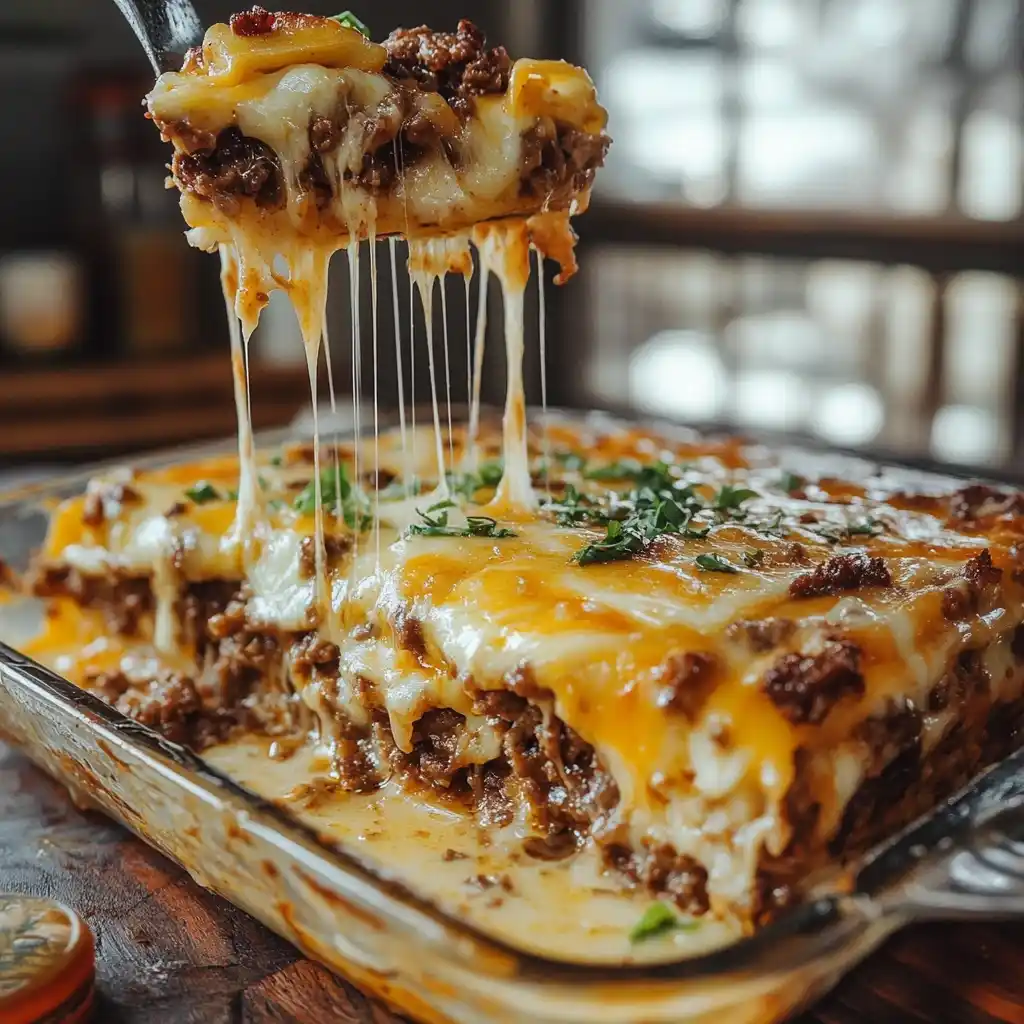
The sour cream and mayo topping is the sleeper element here. Mixed with cheddar and green chiles, it bakes into something closer to a savory custard than a spread, sinking slightly into the layers below and adding a creamy richness that holds the casserole together when you cut and serve it.
It also holds up well through the week. The flavors develop overnight and the texture stays consistent, which makes it a strong candidate for planned leftovers.
Ingredients for Cattle Drive Casserole
The ingredient list reads like a Tex-Mex pantry run, and most of it is likely already on hand.
For the biscuit base:
- 2 1/2 cups Bisquick, or one box Red Lobster Cheddar Bay Biscuit mix
- 1 cup water, or 3/4 cup milk if using the box mix
For the beef layer:
- 1 1/2 lbs lean ground beef
- 1 small yellow onion, diced
- 1 red bell pepper, diced
- 1 packet (1 oz) taco seasoning
- 1/4 cup water
For the creamy topping:
- 1/2 cup sour cream
- 1/2 cup mayonnaise
- 1 teaspoon garlic powder
- 1 cup shredded cheddar cheese, plus extra for the top
- 1 can (4 oz) diced green chiles, drained
For extra zest:
- 1 can (10 oz) Rotel diced tomatoes and green chiles, drained
For the biscuit base, the Red Lobster Cheddar Bay Biscuit mix is the upgrade worth making when you have it. The cheddar and garlic herb flavor built into that mix adds a layer to the base that plain Bisquick doesn’t have, and it works particularly well against the Tex-Mex layers above. Standard Bisquick is a perfectly reliable base if that’s what’s on hand.
On the beef, lean ground beef keeps excess grease from soaking into the biscuit base during baking. I find that draining thoroughly after browning is the most important step for maintaining the texture of the crust layer. If you want to lighten the dish, ground turkey works well and keeps the same seasoning structure.
For the Rotel, draining is non-negotiable here. Undrained tomatoes release liquid into the casserole during baking that can prevent the biscuit base from cooking through properly and leaves the creamy topping too wet to set.
How to Make Cattle Drive Casserole
The assembly moves quickly once each component is prepared. Having the beef cooked and the creamy topping mixed before the biscuit dough goes into the pan keeps everything flowing in the right order.
- Preheat the oven to 350°F. Grease a 9×13-inch baking dish thoroughly on the bottom and sides.
- Mix the Bisquick and water in a bowl until a soft, slightly sticky dough forms. Spray your fingers or a spatula lightly with non-stick cooking spray before pressing the dough into the baking dish. This is the single most practical tip for this recipe since biscuit dough clings to everything and a light spray makes it spread easily into an even layer across the entire bottom of the pan. For a firmer base that holds up better under the weight of the toppings, pre-bake the crust alone for 5 to 8 minutes before adding any layers. It firms the surface just enough to prevent the beef layer from pressing into the dough during assembly.
- In a large skillet over medium-high heat, brown the ground beef with the diced onion and red bell pepper until the meat is fully cooked and the vegetables have softened, about 8 to 10 minutes. Drain the excess grease thoroughly. Stir in the taco seasoning and 1/4 cup of water, then simmer for 2 to 3 minutes until the sauce has thickened and coats the beef evenly.
- Spread the seasoned beef mixture over the biscuit dough in an even layer. Scatter the drained Rotel tomatoes over the beef and spread them to the edges.
- In a medium bowl, whisk together the sour cream, mayonnaise, garlic powder, 1 cup of shredded cheddar, and drained green chiles until smooth. Spread this mixture evenly over the Rotel layer, working it all the way to the edges of the dish. In my experience, using the back of a spoon in a gentle spreading motion rather than pressing down hard keeps the layers from mixing together during assembly.
- Sprinkle a generous handful of extra shredded cheddar over the entire surface.
- Bake uncovered for 30 to 35 minutes until the cheese topping is bubbling across the surface, golden at the edges, and the biscuit base is cooked through. To check the biscuit base, insert a toothpick or thin knife into the corner of the dish where the base is thickest. It should come out without raw dough clinging to it.
- Remove from the oven and let the casserole rest for a full 10 minutes before cutting. The biscuit base and creamy topping both need this time to set, which is what allows clean, intact servings rather than a layered spill when the spatula goes in.
What to Serve with Cattle Drive Casserole
This is a full, complete dinner from one dish, but the right sides turn it into a proper spread for feeding a crowd.
Mexican Street Corn Salad: A creamy elote-style corn salad with cotija cheese, lime, and chili powder adds brightness and acidity that cuts through the richness of the creamy topping. It also keeps the Tex-Mex theme consistent across the meal without requiring much additional prep.
Fresh Cilantro and Sliced Jalapeños: Keeping garnishes on the table rather than baked in gives everyone control over heat level. A small bowl of sliced fresh jalapeños and a handful of torn cilantro alongside the casserole makes a meaningful difference for those who want the brightness.
Guacamole: A simple guacamole served alongside adds freshness and cool creaminess that complements the baked layers. It works both as a side and as a topping dolloped directly onto each serving.
Simple Green Salad: A lightly dressed salad with a lime vinaigrette keeps the meal from feeling too heavy overall. The acidity of the dressing is a natural contrast to the richness of the sour cream and mayo layer.
Refried Beans: Warm refried beans alongside the casserole round out the protein and add a classic Tex-Mex element that feels at home next to the taco-seasoned beef.
Pro Tips & Variations
Pre-bake the crust. Even 5 to 8 minutes in the oven before the toppings go on makes a real difference in the finished texture of the base. It firms the surface just enough that the beef layer doesn’t compress into the dough, keeping the layers distinct when you cut and serve.
Drain everything well. Both the Rotel and the green chiles should be thoroughly drained before they go into the casserole. Excess liquid is the main reason biscuit bases in layered casseroles come out undercooked or soggy.
Use the Cheddar Bay mix. The garlic herb cheddar flavor in the Red Lobster biscuit mix adds a dimension to the base that takes the casserole noticeably beyond the standard version. It’s a minor upgrade that pays off in every bite.
Try refrigerated biscuit tubes as a shortcut. Two tubes of refrigerated pop-can biscuits pressed together into a single sheet and spread into the pan works as a practical substitute for the mixed biscuit dough. The texture is slightly different but the structure holds well.
Add black beans. A drained can of black beans stirred into the beef layer alongside the taco seasoning adds fiber and makes the dish more filling. It stretches the casserole further for a larger crowd without changing the method.
Spice it up. A teaspoon of chipotle powder added to the taco seasoning, or using hot Rotel in place of the original, brings the heat up meaningfully for a crowd that wants more kick.
Storage & Reheating Tips
Store leftover casserole in an airtight container in the refrigerator for up to 3 days. The flavor genuinely improves overnight as the taco seasoning and creamy layers settle together. It’s one of those dishes that’s arguably better as a leftover than it is fresh, which makes it an ideal option for planned weekly meals.
To reheat, I prefer the oven for the best texture. Cover the dish loosely with foil and warm at 325°F for 15 to 20 minutes until heated through. This keeps the biscuit base from drying out and the cheese topping from turning rubbery. For individual portions, the microwave at medium power in 60-second intervals works well enough for a quick lunch.
For freezing, portion cooled slices into individual freezer-safe containers. They keep for up to 2 months. Thaw overnight in the refrigerator before reheating covered in the oven.
Common Questions
My biscuit base is undercooked in the center. What went wrong? This almost always traces back to excess liquid from the tomatoes or undrained chiles soaking into the dough during baking. Make sure both the Rotel and green chiles are thoroughly drained before layering. Pre-baking the crust for 5 to 8 minutes before adding any toppings also gives the base a head start that prevents this issue.
Can I assemble this the night before? You can prep the components separately and refrigerate them individually, but fully assembling the casserole the night before isn’t ideal since the biscuit dough will absorb moisture from the beef and Rotel layers overnight. Mix the biscuit dough and press it into the pan the day of baking. Everything else can be prepped in advance.
How do I keep servings from falling apart when I cut the casserole? The 10-minute rest after baking is essential here. The creamy topping firms as it cools and the biscuit base sets, which is what allows clean portions. A thin metal spatula with a flat edge rather than a slotted spatula gives you the most control when lifting servings from the pan.
The cattle drive casserole earns its legendary status one serving at a time. It’s the kind of recipe that gets asked about at every potluck and added to family recipe boxes without much ceremony because it simply works, every time. Get it on the table, let it rest those full 10 minutes, and it will do the rest of the work itself
Cattle Drive Casserole
Ingredients
Equipment
Method
- Preheat oven to 350°F (175°C). Grease a 9×13-inch baking dish thoroughly.
- Mix the Bisquick and water in a bowl until a soft dough forms. Spray your fingers or a spatula lightly with non-stick cooking spray. Press the dough evenly into the bottom of the prepared baking dish. Optional: Pre-bake the crust alone for 5 to 8 minutes to firm the surface before adding toppings.
- In a large skillet over medium-high heat, brown the ground beef with the diced onion and red bell pepper until the meat is fully cooked and the vegetables are softened, about 8 to 10 minutes. Drain excess grease thoroughly.
- Stir the taco seasoning and 1/4 cup water into the beef. Simmer for 2 to 3 minutes until the sauce thickens and coats the meat evenly.
- Spread the seasoned beef mixture evenly over the biscuit dough. Scatter the drained Rotel tomatoes over the beef layer and spread to the edges.
- In a medium bowl, whisk together the sour cream, mayonnaise, garlic powder, 1 cup of shredded cheddar, and drained green chiles until smooth. Spread evenly over the Rotel layer using the back of a spoon, working to the edges without pressing down into the layers below.
- Sprinkle a generous handful of extra shredded cheddar over the entire surface.
- Bake uncovered for 30 to 35 minutes until the cheese topping is bubbling across the surface and golden at the edges, and a toothpick inserted into the corner biscuit base comes out without raw dough.
- Remove from the oven and rest for 10 minutes before cutting. Use a flat metal spatula for clean, intact servings.